Tag: Multiplayer Games

Palworld How To Get Coal Locations And Mining...
As players progress into the mid-and-late game of Palworld, Coal becomes one of the most critical resources needed for crafting advanced gear, high-tier weaponry, and Refined Ingots. Understanding where to find dense clusters of Coal nodes and how to farm them efficiently can save you hours of manual labor. This guide highlights the top mining locations and practical strategies to maximize your overall resource yield.
Prime Coal Mining Coordinates Across Palpagos Islands
One of the best early-to-mid-game spots for harvesting Coal is located in the Twilight Dunes around coordinates (-158, -93) and (-98, -121). These desert regions feature several dark Coal nodes grouped tightly together, making manual farming quick and reliable. However, players must bring heat-resistant armor to survive the scorching desert temperatures during daytime exploration.
For a climate-friendly alternative that blends both Coal and regular Ore deposits, head east of the Sealed Realm of the Guardian around coordinates (180, -39). This elevated ridge hosts roughly six Coal nodes alongside plentiful Ore, allowing players to supply their furnaces without constant traveling. Verdant Brook at (190, -41) also offers a lush, safe environment with up to eight nodes clustered on high ground.
Choosing the Right Pals and Tools for Automated Mining
To mine Coal effectively on your own, equip at least a Metal Pickaxe or better, which significantly speeds up node destruction compared to basic stone tools. If you prefer automated gathering, ensure your base Pals possess a Mining Work Suitability of Level 3 or higher, as lower-level miners cannot break raw Coal rocks. Popular mid-game choices like Digtoise or Reptyro excel at harvesting these stubborn deposits continuously.
For late-game setups, high-tier miners such as Anubis, Astegon, or Blazamut dramatically increase resource yield. Placing wooden storage chests and a Feed Box directly beside active nodes minimizes transportation time for carrying Pals. With a well-structured base layout, your assigned Pals will steadily fill storage containers while you explore.
Alternative Methods and Late-Game Coal Production
Beyond natural rock nodes, players can acquire Coal by defeating or capturing specific Pals found in volcanic and desert zones. Wild Pals such as Blazamut, Menasting, and Pierdon regularly drop Coal upon defeat, providing a quick supplement while hunting boss targets. However, harvesting node clusters remains the most dependable approach for bulk supply requirements.
Once you reach higher technology levels, unlocking the Coal Mine facility provides a completely renewable source of Coal inside any base. Building this structure requires Stone, Coal, Paldium Fragments, and Ancient Civilization Parts. Constructing a Coal Mine inside your primary industrial hub removes the need to maintain isolated outpost bases altogether.
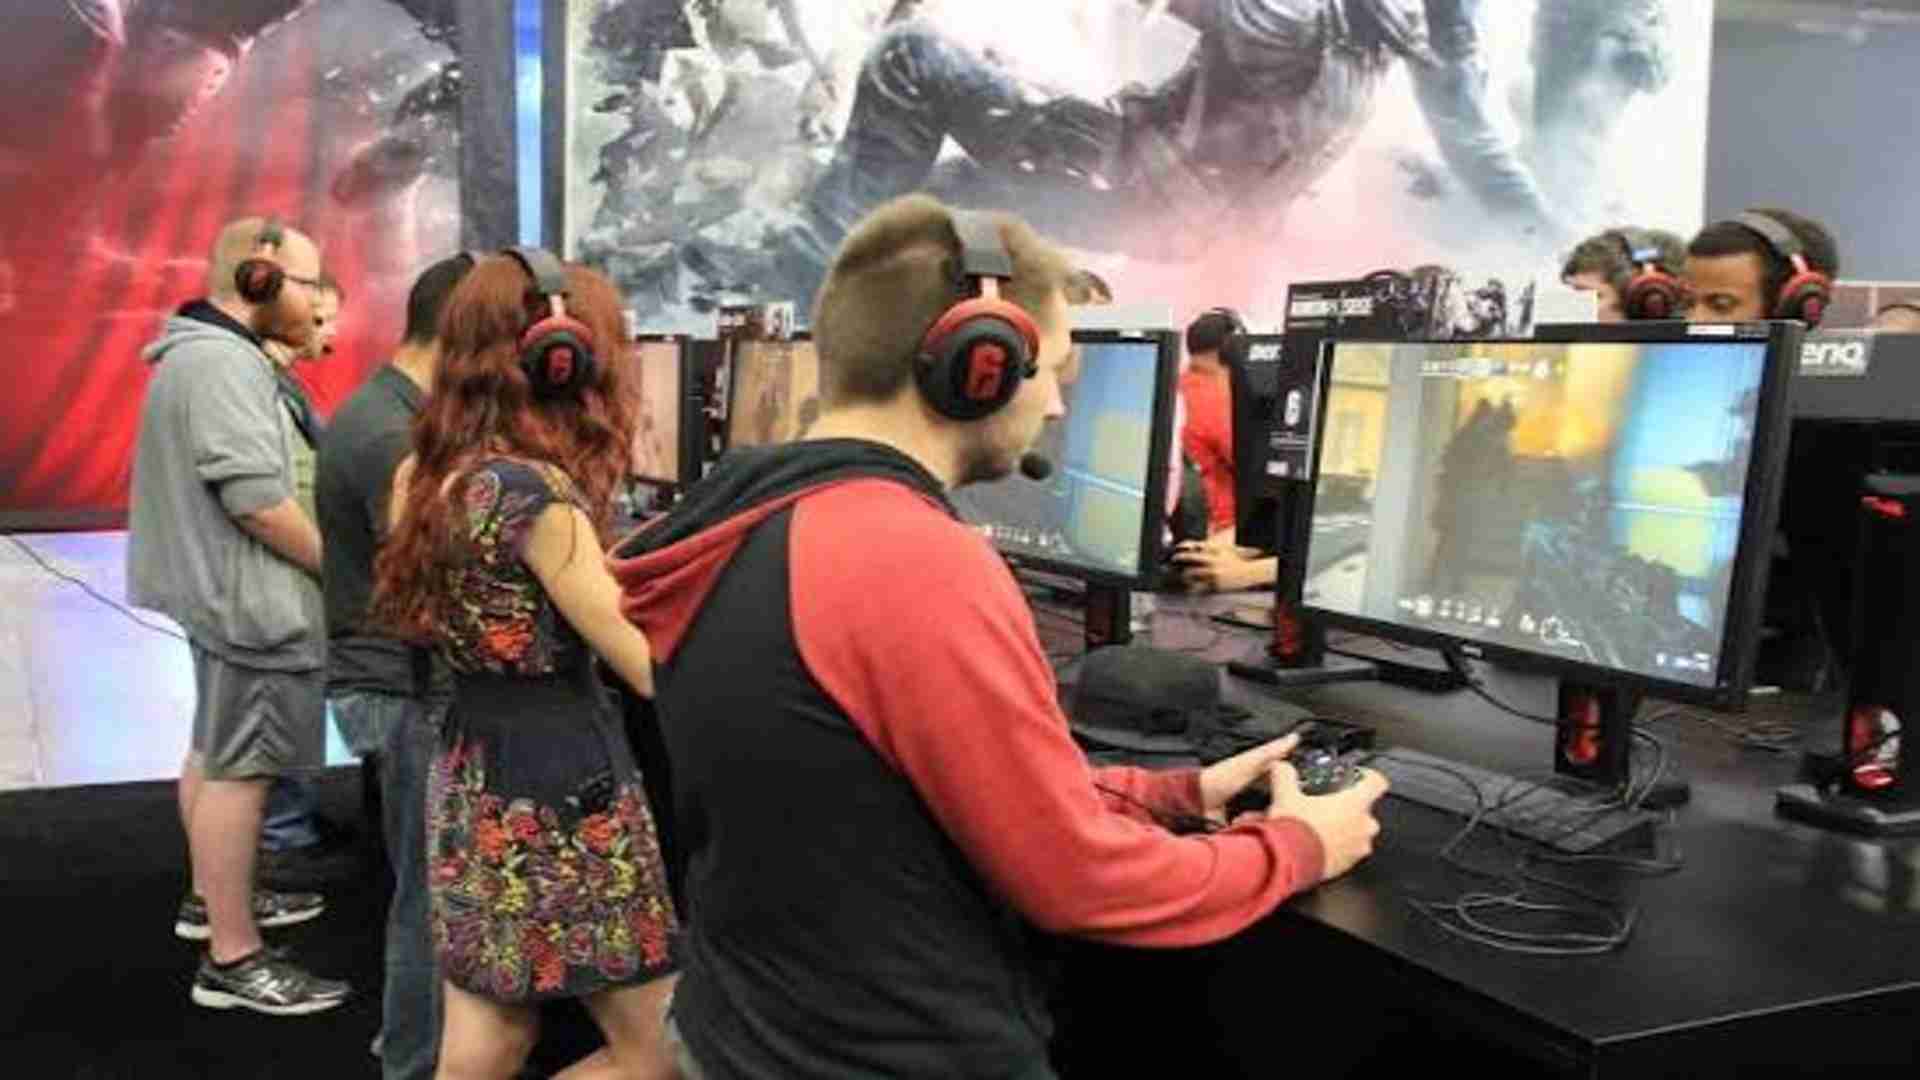
Delta Force Special Forces M4 Setup Best Attachments...
The M4A1 remains one of the most versatile and reliable assault rifles in Delta Force Hawk Ops, serving as a staple choice for players who value adaptability across medium to long-range engagements. Configuring the optimal setup requires balancing recoil control, aiming stability, and fire rate to suit modern tactical playstyles. Understanding which attachments synergize best allows operators to dominate gunfights whether pushing tight corridors or holding defensive sightlines.
Optimizing Recoil Control and Barrel Attachments
To maximize precision at extended ranges, selecting the right muzzle and barrel combination is essential for reducing both vertical and horizontal kick. A heavy extended barrel increases muzzle velocity while smoothing out spray patterns during sustained firing sequences. Pairing this with a tactical suppressor ensures your position remains hidden on the radar without sacrificing crucial damage range.
Managing recoil control further depends on chosen underbarrel accessories that steady your aim during intense skirmishes. An angled foregrip or specialized operator grip helps stabilize crosshair drift, making follow-up shots significantly easier to land. These modifications transform the M4 into a laser-accurate platform capable of beaming distant opponents with minimal effort.
Optics and Sight Options for Precision Targeting
Optic selection often dictates how effectively you can track moving targets across varied combat environments in Delta Force. Clean red dot sights or holographic optics offer low-magnification clarity for fast target acquisition in close-quarters scenarios. For medium-range engagements, a hybrid scope allows seamless switching between different magnification levels depending on the tactical situation.
Choosing an optic with minimal visual clutter helps maintain situational awareness when engaging multiple enemies simultaneously. Clear reticles ensure that your vision remains unobstructed while tracking targets through heavy smoke or gunfire debris. Experimenting with sight picture preferences allows players to find a comfortable balance between zoom level and peripheral vision.
Magazine and Ergonomic Upgrades for Mobility
Sustaining firepower in prolonged engagements requires upgrading the standard magazine capacity to handle multiple threats without frequent reloading. An expanded 45-round or 60-round magazine provides the necessary ammo pool to clear objective sites effectively. However, operators should stay mindful of minor penalties to aim-down-sights speed when equipping larger capacity options.
To offset mobility losses from heavier magazines, equipping high-tier rear grips and lightweight stocks restores agile handling performance. Ergonomic pistol grips improve sprint-to-fire times, enabling quicker reaction speeds when stumbling upon unexpected enemy positions. A balanced stock choice maintains aim stability while keeping weapon responsiveness sharp during sudden movement transitions.
Complete Loadout Strategy and Tactical Synergies
Building a complete loadout involves pairing your customized M4 with complementary secondary weapons and tactical gear tailored for team play. A reliable sidearm or high-damage secondary serves as an effective backup option during emergency reload situations. Equipping utility items like smoke grenades further aids in controlling sightlines and facilitating safe team maneuvers across open territory.
Selecting perks or specialist skills that enhance ammo retention and mobility solidifies this weapon setup's dominance on the field. Staying mobile while maintaining accurate fire allows Special Forces players to adapt continuously to shifting battlefield conditions. Mastering this optimized M4 loadout ensures high combat efficiency across all competitive modes in Delta Force.

Resident Evil 2 Lion Statue Code 2nd Run...
Navigating the police station in Resident Evil 2 during a 2nd Run playthrough brings a fresh layer of challenge for both casual players and survival horror veterans. Unlike the initial scenario, the B Scenario rearranges puzzle solutions and key item locations, forcing players to abandon their memory of previous codes. Solving the Lion Statue puzzle is one of the earliest milestones necessary to unlock the secret passage under the Main Hall.
The Solution for the 2nd Run Lion Statue
To open the Lion Statue lock during the 2nd Run scenario, players must dial in three specific symbols. The correct combination required for this B Scenario puzzle consists of the Crown, the Torch (or Fire), and the Bird. Inputting these icons correctly into the dials immediately releases the Lion Medallion into your inventory.
Where to Find the Solution In-Game
Players looking to uncover this combination organically can find clues hidden within the police department. By exploring the Lounge near the Library, you can acquire a tin box containing a roll of film titled Lion Statue. Developing this film inside the Dark Room reveals a photograph that explicitly displays the Crown, Torch, and Bird solution.
How the 2nd Run Alters Standard Puzzles
The alternate scenario fundamentally alters how players approach police station progression compared to standard playthroughs. While the A Scenario relies on the Officer's Notebook for medallion codes, the 2nd Run forces players to rely on film rolls and altered memos scattered across dangerous corridors. This design shift keeps the gameplay tense by preventing players from breezing through safety codes on subsequent runs.
Tips for Managing Medallions Efficiently
Once you collect the Lion Medallion, placing it directly into the Goddess Statue in the Main Hall frees up critical inventory space. Combining this step with quick routes to the Unicorn and Maiden statues minimizes backtracking through areas populated by persistent threats like Mr. X. Efficient inventory management remains essential for carrying weapon parts, ammo, and healing items during these tighter B Scenario campaigns.

GTA V How To Make Money Fast With...
Building a massive fortune in Grand Theft Auto V requires a smart combination of story missions, strategic investments, and lucrative side hustles across Los Santos. Whether you are aiming to buy luxury real estate or fully customize high-end vehicles, knowing where to focus your effort makes a significant difference. Understanding the most profitable activities helps players maximize their time and earn millions efficiently.
Capitalizing on Lesters Assassination Missions
The single most profitable way to make money in story mode is by delaying Lester's assassination missions until after completing the main storyline. This clever strategy allows players to invest the massive payouts from the final heist into specific stock exchange targets before starting each contract.
When Lester targets key corporate executives, the in-game stock market fluctuates dramatically in response to the disruption. Investing all available funds across Franklin, Michael, and Trevor prior to accepting these missions yields massive financial returns. Timing your stock sales immediately after the market peaks ensures maximum profit multiplication for every character.
Maximizing Payouts from Main Story Heists
Executing main heists with the optimal strategy and crew selection directly impacts the final cash reward. Choosing crew members with lower cut percentages can significantly increase overall profits, provided their skill levels do not cause catastrophic mission failure.
Planning each heist carefully allows players to minimize unnecessary operational costs and secure the largest possible take from bank vaults. For example, selecting the smartest approach in The Paleto Score and The Big Score maximizes total cash retention for the crew. Taking time to re-evaluate crew choices ensures you leave each job with the highest possible payout.
Profitable Random Encounters and Side Quests
Exploring the map reveals dynamic random events that offer immediate financial boosts for minimal effort. Helping citizens recover stolen property or rescuing specific individuals often results in generous cash rewards or exclusive stock market recommendations.
One notable encounter involves returning a stolen bicycle to a wealthy teenager who later rewards the player with a huge stock portfolio grant. Another profitable event involves driving a stranded businessman to the airport, who gives a time-sensitive stock tip in exchange for a speedy ride. Keeping extra cash on hand during free exploration ensures you can take full advantage of these spontaneous opportunities.
Engaging in Consistent Side Activities
Beyond major story objectives, various side activities provide steady cash flow to support day-to-day expenses across Blaine County. Intercepting armored security vehicles by blowing open their rear doors yields instant cash drops that can be collected quickly before police arrive.
Purchasing income-generating properties like the Towing Impound or Sonar Collections Dock creates consistent weekly revenue streams for your characters. Participating in street races, arms trafficking, and flight school challenges also offers direct monetary rewards while simultaneously improving key character stats. Combining these diverse activities creates a reliable system for continuous wealth generation throughout your playthrough.

M.2 Not Showing Up Causes And Troubleshooting Solutions
Installing a high-speed M.2 solid-state drive is one of the most effective ways to boost PC performance, but it can be frustrating when the drive fails to appear in File Explorer or the system BIOS. This issue occurs frequently during new system builds or after adding secondary storage drives. Understanding the underlying causes can help users systematically troubleshoot and resolve the problem without losing valuable data.
Checking Physical Installation and Hardware Compatibility
The most common cause of an undetected M.2 drive is improper seating inside the slot on the motherboard. Users should power down the system, unplug the power supply, and carefully reinsert the drive at a thirty-degree angle before securing the retaining screw. It is also essential to verify whether the motherboard slot supports NVMe or SATA protocols, as inserting an incompatible drive type into a specific slot will prevent recognition.
Adjusting BIOS and UEFI Configuration Settings
If the hardware is installed correctly, motherboard firmware settings may be preventing the operating system from detecting the drive. Restarting the PC and entering the BIOS menu allows users to check if the M.2 slot is manually disabled or set to the wrong PCIe bandwidth mode. Enabling CSM (Compatibility Support Module) or toggling between RAID and AHCI mode often allows legacy systems to recognize newer storage devices properly.
Initializing and Formatting Unallocated Drives in Windows
A brand new M.2 drive might be physically detected by the motherboard but remain invisible in Windows File Explorer because it lacks a partition layout. Users can open the Disk Management tool by right-clicking the Start button to check if the drive appears as unallocated space. Initializing the disk using GPT and creating a new simple volume formatted with NTFS makes the drive immediately accessible for daily storage needs.
Updating Storage Controllers and Motherboard Drivers
Outdated chipset software and missing NVMe controller drivers can prevent the operating system from communicating with high-speed storage components. Visiting the motherboard manufacturer's support page ensures that all relevant SATA, PCIe, and motherboard drivers are completely updated. Installing the latest BIOS version can also resolve known hardware bugs and improve compatibility with newly released drive models.

How To Play Multiplayer In Elden Ring Complete...
Navigating the vast expanse of the Lands Between can be a daunting experience when tackling terrifying bosses solo. Fortunately, Elden Ring features robust online multiplayer systems that allow players to join forces or test their skills in player-versus-player combat. Understanding how to utilize specific finger items and summoning pools is key to seamless cooperative gameplay.
Essential Items Required for Cooperative Play
Before jumping into online sessions, players must obtain a few key tools to manage their multiplayer interactions. The Tarnished's Furled Finger allows you to place down a golden summon sign on the ground for others to see. To reveal summon signs placed by other players in your world, you need to use a consumable item called the Furlcalling Finger Remedy.
Crafting these remedies is straightforward and requires basic materials found throughout the open world. Players can gather Erdleaf Flowers to quickly craft remedies whenever they need assistance during exploration. Having a steady supply ensures you are always ready to call upon allies when facing tough obstacles.
How Summoning Pools and Effigies Simplify Matchmaking
In addition to manual sign placement, Elden Ring introduced Martyr Effigies located near major dungeons and boss arenas. Interacting with these small stone statues activates local summoning pools to gather signs from nearby adventurers. This system makes finding cooperative partners significantly faster compared to searching random ground locations.
By using the Small Golden Effigy item, players can broadcast their summon sign across multiple active pools simultaneously. This feature removes the hassle of waiting in one specific spot while offering assistance to others. It serves as a reliable way to get drawn into action across various regions quickly.
Playing directly with Friends Using Passwords
Connecting with specific friends requires using the built-in password matchmaking system within the multiplayer menu. By entering matching passwords, players bypass level-based matchmaking restrictions and ensure only friends can see their summon signs. High-level allies who join lower-level hosts will have their stats dynamically scaled to maintain gameplay balance.
Setting up group passwords offers additional benefits like prioritizing player messages, bloodstains, and phantom visual appearances. Sharing a group code with friendly communities enhances the shared world experience significantly. It creates an interconnected feeling without limiting your standard cooperative options.
Important Rules and Limitations in Multiplayer
While playing with allies provides significant advantages, cooperative sessions come with specific rules and trade-offs. Summoning additional players increases the overall health pools of bosses to preserve a balanced challenge. Furthermore, players lose access to their spirit steed Torrent while online interactions remain active in the session.
Defeating the primary area boss completes the cooperative objective and automatically sends summoned allies back to their own worlds. Opening your world to friendly phantoms also exposes you to potential invasions from hostile players seeking combat. Knowing these mechanics helps you plan effective strategies and make the most of every multiplayer session.

The Evil Within 2 Anima Enemy And Story...
The Evil Within 2 introduces players to a psychological survival horror experience that expands upon the traumatic journey of Sebastian Castellanos. Among the various terrifying entities lurking within STEM, Anima stands out as one of the most mysterious and unsettling side-quest encounters in the game. Understanding her background, gameplay mechanics, and narrative significance provides deeper insight into Sebastian's psyche.
The Nature of the Anima Entity
Anima is a spectral, ghostly figure that invades Sebastian's mind through specific optional encounters scattered across the union map. Unlike physical monsters created by the STEM core, Anima represents a lingering manifestation of psychological trauma and grief from Beacon Mental Hospital. Her chilling hums and freezing ambient temperatures alert players to her presence before she even appears.
This haunting phantom cannot be killed using conventional firearms or weapons in Sebastian's arsenal. When she appears, the environment warps into a claustrophobic version of past horrors, forcing players to rely entirely on stealth and evasive maneuvers. Confronting her requires patience and careful observation of her patrol routes.
Story Connections and Psychological Impact
Anima serves as a physical embodiment of Sebastian's lingering PTSD from the horrific events of the first game. As Sebastian explores Union to find his daughter Lily, Anima continuously tries to drag him back into the guilt and madness he barely survived. Her presence highlights the underlying theme that STEM manipulates the unresolved mental scars of anyone plugged into the system.
By completing the optional encounters associated with Anima, players unlock critical lore that bridges the gap between both titles in the series. Resolving these spectral side missions allows Sebastian to confront his past traumas rather than letting them control him. This narrative arc reinforces his personal growth and determination to save his daughter.
Encounters and Stealth Mechanics
Surviving encounters with Anima requires a distinct tactical approach compared to standard combat situations. When trapped in her warped dimensions, direct line-of-sight must be avoided at all costs while navigating around obstacles. Crouching behind barriers and moving quietly are essential strategies for remaining undetected.
If Anima spots Sebastian, she instantly initiates an unavoidable execution sequence that results in immediate death. Players must carefully track her movement patterns and wait for opportune moments to slip past her vision cones. Success relies on composure under tension rather than quick mechanical aiming skills.
Rewards for Overcoming the Nightmare
Conquering all of Anima's encounters yields valuable rewards that aid Sebastian's overall survival. After completing her final psychological trial, players earn access to the iconic revolver from the original game. This weapon provides substantial firepower and precision for dealing with other threats throughout Union.
Beyond equipment, completing these encounters provides immense satisfaction by fully resolving one of the game's most atmospheric storylines. It offers a comprehensive understanding of Sebastian's mental fortitude and adds significant depth to the game's world-building. Engaging with Anima's story elevates the overall survival horror experience.

Jar Jar Binks Minecraft Skin Ideas And How...
Bringing iconic Star Wars characters into Minecraft allows players to express their fandom in creative ways throughout their blocky adventures. Jar Jar Binks remains one of the most recognizable figures from the prequel trilogy, making his distinct Gungan features a fun choice for custom character designs. Whether you want a funny cosmetic look for multiplayer servers or a themed avatar for roleplay worlds, choosing the right skin design can completely transform your appearance.
Classic Gungan Outfit Designs
The traditional Jar Jar Binks skin focuses on replicating his iconic look from Episode I with high fidelity. Creators often use earthy tones like orange, beige, and brown to capture his distinctive vest and trousers accurately. Custom pixel shading helps highlight his long ears and tall eyestalks directly on the character model head layer.
For added detail, many skin designers utilize the outer jacket layer feature to give his clothing a textured, three-dimensional feel. This design works exceptionally well on survival servers where you want a recognizable look without overly complex modifications. It provides a balanced aesthetic that stays true to the original Star Wars character design.
Darth Jar Jar and Alternate Concepts
p>One of the most popular community variations is the infamous Darth Jar Jar concept skin. This design swaps out his humble clothes for dramatic black Sith robes, glowing yellow eyes, and subtle dark side accents. It offers a hilarious twist for players who enjoy fan theories and unique character themes.Other creative options include armored Gungan warrior variants or modern casual takes on the classic character outfit. Using a distinct skin allows players to stand out during minigames and group events effortlessly. You can also customize existing templates using online skin editors to add personal touches before playing.
How to Apply Your New Minecraft Skin
Applying a custom skin in Minecraft is a straightforward process that takes only a few simple steps. First, download your chosen Jar Jar Binks PNG skin file from a trusted community site to your computer or mobile device. Make sure the file retains its original dimensions and format so the game engine reads the pixel map correctly.
Next, open the official Minecraft Launcher, select the Skins tab at the top menu, and click on the New Skin option. Upload your saved image file, choose between the Slim or Classic arm model according to your template format, and save the settings. Once applied, your character will display the new Gungan look as soon as you join any single-player world or online server.

Jar Jar Binks Minecraft Skin Ideas And How...
Bringing iconic Star Wars characters into Minecraft allows players to express their fandom in creative ways throughout their blocky adventures. Jar Jar Binks remains one of the most recognizable figures from the prequel trilogy, making his distinct Gungan features a fun choice for custom character designs. Whether you want a funny cosmetic look for multiplayer servers or a themed avatar for roleplay worlds, choosing the right skin design can completely transform your appearance.
Classic Gungan Outfit Designs
The traditional Jar Jar Binks skin focuses on replicating his iconic look from Episode I with high fidelity. Creators often use earthy tones like orange, beige, and brown to capture his distinctive vest and trousers accurately. Custom pixel shading helps highlight his long ears and tall eyestalks directly on the character model head layer.
For added detail, many skin designers utilize the outer jacket layer feature to give his clothing a textured, three-dimensional feel. This design works exceptionally well on survival servers where you want a recognizable look without overly complex modifications. It provides a balanced aesthetic that stays true to the original Star Wars character design.
Darth Jar Jar and Alternate Concepts
p>One of the most popular community variations is the infamous Darth Jar Jar concept skin. This design swaps out his humble clothes for dramatic black Sith robes, glowing yellow eyes, and subtle dark side accents. It offers a hilarious twist for players who enjoy fan theories and unique character themes.Other creative options include armored Gungan warrior variants or modern casual takes on the classic character outfit. Using a distinct skin allows players to stand out during minigames and group events effortlessly. You can also customize existing templates using online skin editors to add personal touches before playing.
How to Apply Your New Minecraft Skin
Applying a custom skin in Minecraft is a straightforward process that takes only a few simple steps. First, download your chosen Jar Jar Binks PNG skin file from a trusted community site to your computer or mobile device. Make sure the file retains its original dimensions and format so the game engine reads the pixel map correctly.
Next, open the official Minecraft Launcher, select the Skins tab at the top menu, and click on the New Skin option. Upload your saved image file, choose between the Slim or Classic arm model according to your template format, and save the settings. Once applied, your character will display the new Gungan look as soon as you join any single-player world or online server.

What Time Is Steal A Brainrot Taco Tuesday...
Roblox players eager to boost their in-game earnings frequently look forward to the chaotic weekly Admin Abuse mode known as Taco Tuesday in Steal a Brainrot. This high-energy event offers unique mechanics, massive luck multipliers, and exclusive rewards that are unavailable during normal gameplay. Understanding the precise timing and preparing in advance ensures that players do not miss out on these limited-time opportunities.
Global Event Schedule and Regional Times
The Taco Tuesday event occurs every week on Tuesday at 6:00 PM Eastern Standard Time (EST). For players joining from other regions, this converts to 3:00 PM Pacific Standard Time (PST), 11:00 PM British Summer Time (BST), and 12:00 AM Central European Time (CET) going into Wednesday.
Because the event is manually triggered by developer SpyderSammy, minor schedule adjustments can occasionally happen. Players are advised to log into the game servers 15 to 30 minutes early to avoid long queues and secure a spot before the chaos begins.
What Happens During the Taco Tuesday Event
During this event, the map transforms into an active zone filled with flying tacos, server-wide luck boosts, and boosted cash multipliers. Tacos rain down on brainrots as they move along the conveyor belt, granting them valuable traits upon impact.
The standard Taco trait instantly triples a brainrot's earning power, providing an immediate boost to your passive income. Fortunate players may even encounter the rare Corrupted Taco variant, which multiplies earnings by five times.
Exclusive Brainrots and Trading Value
Taco Tuesday introduces exclusive taco-themed brainrots that cannot be acquired under regular game conditions. Examples include Tip Topi Taco, Bombardini Tortinii, and Nooo My Hotspot, all of which offer impressive cash generation rates.
These limited-edition units retain significant value in the trading market long after the event ends. Players who manage to collect rare variants can trade them with others who missed the session for substantial profit.
How to Prepare for Maximum Success
Since Taco Tuesday typically lasts only 30 to 45 minutes, efficient preparation before the start time is essential. Clearing inventory space and positioning your character near prime spawn zones will allow you to react quickly when tacos begin to fall.
Playing on a private server is another effective strategy to avoid intense competition from other players. Taking advantage of every minute during the event will maximize your chances of collecting top-tier brainrots and multiplying your wealth.

Windows Kernel Mode Heap Corruption Causes And Troubleshooting
The Windows Kernel Mode Heap Corruption blue screen error is a critical system stop code that signals memory mismanagement at the core operating system level. When this issue occurs, Windows immediately halts operation to prevent further data corruption and hardware instability. Understanding the underlying triggers of this system crash allows users to restore performance and maintain long-term stability.
Primary Causes of Kernel Mode Heap Corruption
This Blue Screen of Death error typically occurs when a low-level driver or program incorrectly writes to system memory allocated for the kernel. Outdated or corrupted device drivers, particularly graphics card software, are among the most common culprits behind these unexpected crashes. Additionally, failing RAM modules and corrupted system files can destabilize memory allocation during heavy workloads.
Software conflicts between background applications, such as aggressive anti-cheat utilities or third-party antivirus programs, can also trigger kernel errors. Hardware factors like excessive component temperatures or unstable system overclocking further aggravate memory management routines. Identifying whether the issue stems from hardware or software is essential for effective resolution.
Resolving Driver and Software Conflicts
Because problematic drivers cause the vast majority of heap corruption crashes, rolling back or updating device software is an effective starting step. Users who recently installed a GPU update should consider removing the new version or performing a clean installation using vendor utilities. Checking Device Manager for hardware components flagged with warning symbols can quickly pinpoint faulty drivers.
To eliminate background software conflicts, performing a clean boot helps isolate problematic third-party applications. Disabling non-essential startup services allows the operating system to launch using only core Windows processes. If the blue screen stops appearing during a clean boot, background software is responsible for the error.
Repairing System Files and Checking Hardware Integrity
Corrupted operating system files can easily prevent Windows from properly managing kernel-level memory resources. Running the Deployment Image Servicing and Management tool alongside System File Checker scans automatically replaces damaged system files. Executing these administrator commands restores core system integrity without requiring a full Windows reinstallation.
When software repairs fail to resolve the error, testing physical memory modules becomes necessary. Utilizing built-in diagnostic tools like Windows Memory Diagnostic helps verify if RAM hardware is physically damaged. Replacing faulty RAM sticks or resetting BIOS settings to default configurations usually eliminates persistent hardware-related crashes.
Long-Term Strategies for System Stability
Maintaining a stable operating system requires keeping graphics drivers and critical system updates current. Monitoring component temperatures and avoiding aggressive hardware overclocks prevents memory allocation errors during demanding tasks. Regular system scans and cautious software installations protect system memory from unexpected corruption.

What Percent of Lottery Winnings Are Taxed and...
Winning a major lottery prize is a life-changing event, but the actual payout is always lower than the headline jackpot due to government taxation. Understanding what percentage of your winnings will be taken in taxes helps you set realistic financial expectations. In most jurisdictions, tax authorities treat lottery prizes as ordinary income, applying progressive income tax brackets alongside mandatory upfront withholdings.
Initial Federal Tax Withholding on Jackpot Prizes
When you win a significant lottery prize, tax collection begins automatically at the federal level before you ever receive the money. The tax authority requires lottery organizations to withhold a mandatory flat rate of 24% on prizes exceeding a certain threshold. However, this upfront withholding serves only as an advance payment toward your total annual tax responsibility rather than your final tax liability.
Because substantial lottery payouts significantly boost your total gross income, they almost always push winners into the highest marginal federal income tax bracket. Currently, the top federal tax rate stands at 37%, creating a 13% gap between what was automatically withheld and what you actually owe. Players who explore gaming platforms like m88 often learn that managing windfall payouts requires careful budget planning to cover end-of-year tax adjustments.
How State and Local Taxes Affect Final Take-Home Pay
In addition to federal obligations, state income taxes play a massive role in determining your final payout percentage. State lottery tax rates vary wildly across the country, ranging from 0% in states without personal income taxes to over 10% in high-tax jurisdictions. Some municipal governments also levy local city income taxes, which can further reduce your net cash payout.
Certain states choose to specifically exempt state lottery prizes from state-level income tax entirely, allowing residents to retain a larger share of their check. Conversely, non-residents who purchase winning tickets in other jurisdictions may find themselves subject to state withholding taxes from the location of purchase. This patchwork of regional regulations makes geographical location a primary factor in the total effective tax calculation.
Calculating Tax Differences Between Lump Sum and Annuity Options
Lottery winners generally must choose between taking a single lump-sum payout or receiving annual installment payments over several decades. Selecting the cash option immediately reduces the gross jackpot amount to its present cash value before any taxes are applied. The entire remaining lump sum is then taxed in one calendar year, placing virtually the entire amount into the maximum marginal tax bracket.
Opting for an annuity spreads your total prize out over thirty annual payments, distributing the income across multiple tax years. While large jackpot annuity payments may still land in the top bracket, smaller payouts might stay within lower tax brackets each year. Evaluating both options with a certified tax professional ensures you select the most tax-efficient structure for your long-term financial goals.

We Need To Cook Meme Meaning Origins And...
The phrase "We need to cook" has transcended its original television drama roots to become one of the most recognizable catchphrases across social media platforms. Derived from the critically acclaimed series Breaking Bad, this line is often quoted to signal the start of an intense plan, project, or creative venture. Today, digital communities use it both literally and metaphorically to express momentum and determination in various online contexts.
The Origins of the "We Need to Cook" Phrase
The famous line traces its roots directly to the award-winning television series Breaking Bad, starring Walter White and Jesse Pinkman. In the show, Walter frequently emphasizes the urgent necessity of producing high-purity methamphetamine in their mobile laboratory. Over time, fans popularized the specific phrasing "Jesse, we need to cook," turning a dramatic plot point into a ubiquitous pop culture reference.
Interestingly, while fans often attribute the exact line to Walter White, the verbatim phrasing evolved through fan edits and online humor. The television show featured similar dialogue across multiple episodes, but social media consolidated the quote into a punchy meme format. This transformation shows how fan communities can reshape television quotes into memorable internet slang.
Understanding the Meme's Modern Meaning
In modern internet culture, the phrase "we need to cook" has shifted away from its darker television context toward a more general expression of productivity. When users post this meme, they typically mean that it is time to formulate a strategy, execute an ambitious idea, or collaborate on a complex goal. It conveys a sense of focus, seriousness, and sudden urgency to accomplish a task.
The meme also aligns closely with modern slang terms like "let him cook" and "he is cooking," which praise someone for performing well or showcasing talent. Calling on others to "cook" implies that something special, unexpected, or highly effective is currently in development. Consequently, the phrase serves as an encouraging rallying cry among gamers, creators, and social media users.
Popular Internet Uses and Media Formats
Social media users employ the "we need to cook" format across short-form videos, image macros, and reaction GIFs. In gaming communities, players frequently post the phrase right before attempting a difficult mission or devising an advanced team strategy. Content creators also use the quote in video titles and captions to generate excitement before launching a major project.
Another popular variation involves combining Walter White's image with unrelated everyday scenarios for comedic contrast. For instance, someone preparing a complex dinner recipe or fixing a software bug might share the image to mock their own intense focus. This versatile blend of dramatic tension and lighthearted self-deprecation keeps the meme fresh and widely used today.
Cultural Impact and Ongoing Relevance
The enduring popularity of the "we need to cook" meme highlights how classic television shows continue to shape modern digital communication. Even years after Breaking Bad concluded, the imagery and thematic weight of the show remain deeply embedded in internet lore. Its seamless integration into modern slang ensures that new generations of internet users encounter and repurpose the joke continuously.
Ultimately, the meme proves that memorable quotes can gain entirely new life through shared digital culture. Whether applied to gaming strategies, creative projects, or playful online banter, the phrase remains a powerful symbol of ambition and teamwork. As internet slang continues to evolve, this iconic catchphrase stands as a classic example of cross-generational digital humor.

Is Batman A Anti Hero Character Definition And...
The debate over whether Batman fits the definition of an anti-hero has fascinated comic book scholars and casual readers for decades. While he fights for justice and protects the innocent, his grim methods and brooding persona set him apart from traditional heroes. Examining his long history reveals a complex character who constantly walks the line between heroics and vigilantism.
Understanding the Definition of an Anti-Hero
An anti-hero is typically defined as a central character in a story who lacks conventional heroic qualities like idealism, moral purity, and unwavering altruism. Instead of acting purely out of noble duty, anti-heroes often operate using questionable tactics, personal vengeance, or dark motivations. They frequently cross boundaries that traditional heroes refuse to touch in pursuit of their goals.
While Batman possesses high intelligence and a deep commitment to saving lives, his reliance on fear and intimidation matches several anti-hero traits. He operates outside the law as a masked vigilante, often striking terror into the hearts of criminals and allies alike. This dark approach leads many analysts to classify him as a prototypal dark hero or modern anti-hero.
Early Comic History and Golden Age Beginnings
When Batman first appeared in Detective Comics in 1939, his portrayal aligned much more closely with classic anti-hero archetypes. In these early Golden Age stories, the Caped Crusader carried firearms and did not hesitate to kill violent criminals when necessary. He was depicted as a ruthless pulp-style vigilante fighting a brutal war against Gotham City's underworld.
As comic book regulations evolved in the 1940s, writers shifted Batman away from these lethal tactics to make him more suitable for broader audiences. His publishers introduced Robin and established a strict moral framework to soften his image. This transition marked his shift from a gritty vigilante toward a recognized superhero emblem.
The Evolution of the Strict No-Kill Code
The defining boundary separating Batman from traditional anti-heroes like the Punisher or Red Hood is his strict policy against killing. This self-imposed rule stems from the trauma of losing his parents and a fundamental belief in the sanctity of human life. By refusing to cross this moral line, he maintains a core distinction between himself and true anti-heroes.
His refusal to eliminate recurring villains often leads to intense ethical dilemmas within Gotham City. Critics within the comics argue that sparing mass murderers allows further tragedy, fueling the debate over his heroic status. Nevertheless, his commitment to restraint remains the bedrock of his psychological identity.
Modern Interpretations and Dark Knight Realism
Modern comic storylines have embraced Batman's dark complexity, presenting him as a flawed figure obsessed with his mission. Creators like Frank Miller re-emphasized his grim determination, showing a hero who operates in moral gray areas to achieve peace. These modern depictions showcase a character who uses brutal force while battling his own inner demons.
Ultimately, Batman is best described as a dark superhero who incorporates prominent anti-hero characteristics. Although his methods are intimidating and illegal, his ultimate goals remain noble and deeply selfless. His enduring legacy lies in his ability to embody justice without losing his humanity.

Assassins Creed Valhalla Who Betrayed Rollo Complete Choice...
During the Essexe arc in Assassin's Creed Valhalla, players must assist a Viking captain named Rollo in uncovering a traitor within his camp. The investigation during the "Old Wounds" quest forces Eivor to evaluate clues and determine whether Lork or Gerhild leaked information to Saxon forces. Identifying the true culprit is essential for ensuring a smooth narrative progression and protecting key allies later in the storyline.
Investigating the Camp Clues and Suspect Alibis
When investigating Rollo's camp, Eivor can interrogate both Gerhild and Lork to hear their respective accounts of the attack. Both suspects initially claim they were out hunting rabbits, but inspecting the meat rack reveals it is already full. Further exploration using Odin's Sight reveals a hiding spot in the tall grass near the camp perimeter.
Upon further questioning, Lork admits that he was actually sleeping in the woods and hid in the grass when the Saxons struck. Gerhild claims she was meeting a Saxon lover, which is suspicious given her vocal resentment toward Rollo's relationships with Saxons. Evaluating these conflicting statements helps reveal who is truly lying about their whereabouts.
Identifying the Traitor: Why Gerhild is Guilty
The true traitor who betrayed Rollo is Gerhild. Her alibi falls apart under scrutiny because she lies about hunting despite the camp having ample food supplies. Additionally, her deep-seated jealousy regarding Rollo's alliance with Estrid gives her a clear motive to conspire with enemy Saxons.
In contrast, Lork is bound by a strict blood oath to Rollo and served Rollo's father honorably for many years. His age and frailty explain why he chose to hide during the sudden ambush rather than fight. Accusing Gerhild prompts Rollo to execute her on the spot, eliminating the threat to his crew.
Consequences of Choosing the Wrong Suspect
If Eivor incorrectly accuses Lork, Rollo executes his loyal warrior while Gerhild goes free. This mistake leads to direct consequences later in the Essexe storyline when Estrid attempts to escape to Francia. Gerhild remains alive to sabotage the plan, ultimately injuring Estrid during her departure.
Correctly naming Gerhild prevents this disaster and allows Lork to protect Estrid during the final stages of the quest. Choosing the right traitor ensures a successful outcome for Rollo's allies and secures a cleaner resolution to the arc.

Phasmophobia How To Turn Off Car Alarm Steps...
Navigating haunted suburban homes in Phasmophobia requires intense concentration, careful listening, and clear communication among team members. When a ghost triggers a car alarm in the garage, the deafening noise instantly disrupts your team's ability to hear crucial audio cues like footsteps, whispers, and spirit box responses. Silencing this distraction quickly is essential for restoring order and keeping your investigative focus sharp.
Finding the Car Keys in Suburban Map Entrances
Before you can interact with the vehicle to turn off the blaring siren, you must locate the specific car key hidden inside the house. These keys are distinct from the main entrance key provided in the equipment truck at the start of a contract. On maps like Tanglewood Drive, Ridgeview Court, or Willow Street, check near the front foyer or entry hall table where key bowls are typically placed.
Searching these high-traffic areas early in the match ensures your team is prepared whenever an entity decides to trigger an environmental disturbance. The car keys automatically register to your inventory once picked up, so you do not need to drop active investigation tools to carry them.
Interacting With the Vehicle to Silence the Noise
Once you have secured the car key from the front entrance area, make your way directly to the garage where the vehicle is parked. Walk up to the driver's side door or hood area to get within interaction distance of the car. Simply press your primary interaction key or left-click on the vehicle while standing nearby.
The car will immediately emit two short beep sounds, signaling that the alarm system has been deactivated. Silencing the alarm promptly prevents key evidence from being obscured by environmental noise during critical evidence-gathering phases.
Overcoming Common Bugs and Tactical Distractions
Occasionally, players may encounter issues where clicking the car fails to register or disable the alarm system. If this happens, ensure you are holding the correct key and not a standard room key found elsewhere in the building. Players utilizing virtual reality setups or console versions should double-check their specific control bindings if standard interaction inputs fail to disarm the vehicle.
Understanding how the ghost interacts with electrical appliances helps investigators identify paranormal evidence faster. Car alarm activations always generate an EMF reading, giving your team valuable data while working to restore quiet. Resolving these loud distractions immediately allows your squad to execute smooth, organized, and effective ghost-hunting sessions.

How To Get Oasis Glass Dreamlight Valley Complete...
Disney Dreamlight Valley introduces players to a wide range of unique crafting materials throughout its expansion content on Eternity Isle. Among these essential resources is Oasis Glass, a material required for several key quests and tool upgrades. Finding this resource efficiently can help players progress smoothly through the game's desert regions.
Where to Find Oasis Glass in the Dunes
Oasis Glass is primarily located within the Glittering Dunes biome on Eternity Isle. Players can search across areas such as The Plains, The Wastes, The Oasis, and The Borderlands. Exploring these sandy expanses allows adventurers to gather the resource using two distinct collection methods.
The first and most accessible technique involves digging directly into the sandy terrain using your shovel. Bringing along a companion with the digging role significantly increases the chances of acquiring extra items. While this method requires time and energy, it provides a consistent stream of glass early on.
Mining Glass Stalagmites with Upgraded Tools
For a much faster alternative, players can break the glass stalagmites scattered throughout the desert. These distinctive glass structures release several units of Oasis Glass when struck with a Royal Pickaxe. Clearing these obstacles not only yields abundant materials but also helps clean up the landscape.
To shatter these structures, players must first complete questlines with Merlin to upgrade their pickaxe. Higher-tier upgrades allow players to break larger stalagmite formations for even greater rewards. Keeping your tools upgraded remains essential for gathering high-level crafting materials efficiently.
Best Uses and Crafting Applications
Once collected, Oasis Glass serves as a critical component in various crafting recipes and quest objectives. Players need this item to construct specialized furniture sets and progress through expansion storylines. It also plays an indispensable role in further enhancing your magical royal tools at the Timebending Table.
Managing inventory space and storing extra glass ensures you will be prepared for future quest requirements. Players can learn more tips by checking during their journey across Eternity Isle. Stockpiling materials beforehand saves significant time during late-game crafting projects.
Maximizing Your Resource Gathering Efficiency
Combining digging and tool-based harvesting provides the best results when gathering Oasis Glass in large quantities. Always pair up with a villager assigned to digging or mining to gain valuable bonus drops. Planning your daily farming loops around the Glittering Dunes makes resource collection fast and hassle-free.
With the right preparation and tool upgrades, acquiring this essential material becomes a straightforward process. Maintaining a healthy supply of food for energy boosts will also speed up your exploration. Using these methods will allow you to unlock new features and complete quests with ease.

Guardians Of The Galaxy Bad Guy Complete Villain...
The cosmic side of the Marvel Universe features some of the most complex antagonists in comic book and cinematic history. Throughout their journeys, the Guardians of the Galaxy have faced galactic tyrants, zealots, and godlike entities that test their bonds as a family. Understanding these key villains provides deep context into the overarching story arcs that define the team’s legacy.
Ronan the Accuser and Cosmic Fanaticism
Ronan the Accuser serves as one of the earliest major threats to the Guardians of the Galaxy. Bound by rigid Kree military doctrine, his desire for ideological purity drives him to forge a dangerous alliance with Thanos. His ruthless mission to destroy Xandar highlights how personal vengeance can escalate into a galaxy-wide catastrophe.
Beyond his physical strength, Ronan wields the Universal Weapon, a hammer capable of channeling massive cosmic energy. His pursuit of the Power Stone demonstrates the extreme dangers of cosmic artifacts falling into fanatical hands. This conflict ultimately forces a group of lone misfits to unite and stand together as galactic protectors.
Ego the Living Planet and Paternal Deception
In contrast to traditional conquerors, Ego the Living Planet presents a deeply personal threat rooted in emotional manipulation. As Peter Quill’s biological father, Ego initially appears as a welcoming savior offering belonging and celestial power. However, his true ambition involves consuming countless worlds to reshape the universe in his own image.
Ego's biological nature makes him a unique antagonist, as his entire planet functions as an extension of his consciousness. Defeating him requires the Guardians to strike directly at his brain core, emphasizing strategy over sheer force. This battle solidifies the team's core theme that chosen family is stronger than toxic lineage.
The High Evolutionary and Cruel Perfection
The High Evolutionary represents a cold, scientific villain whose obsession with genetic perfection leads to unimaginable suffering. Driven by a desire to construct an idealized society, he conducts relentless experiments on living beings across the cosmos. His personal connection to Rocket Raccoon turns his campaign into an intensely emotional struggle for the team.
Unlike villains seeking simple conquest, the High Evolutionary views himself as a rightful architect of life. His vast technological empire and god complex make him one of the most terrifying foes the Guardians ever face. Overcoming his tyranny requires every member of the team to embrace their individual identity and protect the vulnerable.
The Legacy of Cosmic Antagonists
The rogues' gallery of the Guardians of the Galaxy stands out because each villain challenges the team's emotional maturity. From cosmic warlords like Thanos to cult leaders, these bad guys shape the heroes' personal growth across every chapter. Their presence ensures that every cosmic battle carries high emotional stakes and meaningful character development.
Analyzing these antagonists reveals how moral convictions define true heroism across the stars. As the franchise expands, these narrative arcs continue to resonate with fans who appreciate nuanced storytelling. The impact of these legendary villains remains central to the enduring appeal of the Guardians' saga.

V Rising Grayson The Armourer Location And Boss...
Grayson the Armourer is a crucial V Blood boss in V Rising that players must defeat to expand their crafting options and upgrade their equipment. Tracking down this armored foe gives players access to essential recipes like the Whetstone, which is vital for early to mid-game progression. Defeating him requires a solid strategy to manage his heavy melee attacks and environmental hazards.
Locating Grayson The Armourer
Grayson the Armourer can be found in the Bandit Armory, located in the southern region of Farbane Woods. Players can easily track his blood trail by using the Blood Altar at their castle base. Traveling to the stronghold reveals a heavily fortified area guarded by various bandit troops that should be cleared beforehand.
Before starting the encounter, it is recommended to clear out adjacent patrols around the arena. Fighting Grayson with additional enemies nearby can quickly make the battle overwhelming. Ensuring a clean fighting space lets you focus entirely on dodging his heavy attacks.
Understanding Grayson Boss Mechanics
Grayson relies heavily on close-range melee attacks and throwing caltrops across the arena floor. These traps deal damage over time and slow your character down, making movement difficult. Managing the arena layout while keeping an eye on his positioning is key to surviving the encounter.
Periodically, Grayson will also throw a massive hammer or charge toward the player with high speed. Using a dashed mobility skill allows you to quickly reposition behind him when he winds up his strongest abilities. Staying mobile prevents you from getting trapped in his damaging surface hazards.
Effective Combat Strategy And Tips
To negate the threat of his caltrops, look for five wooden mannequin suits placed around the battle area. Interacting with these armor mannequins grants your vampire a temporary shield that removes movement penalties and absorbs incoming damage. Utilizing these armors whenever the floor becomes covered in traps keeps the fight manageable.
Ranged magic spells and fast melee weapons like swords or spears work exceptionally well against his telegraphed attacks. Maintaining a balance between offensive pressure and tactical retreat ensures you do not take unnecessary hits during his rage phases.
Rewards And Crafting Unlocks
Defeating Grayson the Armourer allows you to extract his V Blood and claim valuable crafting knowledge. The primary unlock is the recipe for Whetstones, an essential material for upgrading weapons and building advanced castle structures. You also gain access to new workshop structures and decorative armor stands for your base.
Mastering this boss fight significantly enhances your survival capabilities and opens up new progression paths in V Rising. With proper movement and clever use of the arena's protective mannequins, players can overcome Grayson with minimal difficulty.

Legend Of Zelda Tears Of The Kingdom Amiibo...
Scanning physical figures in The Legend of Zelda: Tears of the Kingdom provides players with a quick way to acquire specialized gear, vital crafting ingredients, and unique customization options. Nintendo has ensured extensive backwards compatibility with legacy amiibo alongside new additions specifically designed for Hyrule's latest adventure. Understanding how these rewards function helps adventurers maximize their daily bonuses without missing out on exclusive collectibles.
How Amiibo Function in Hyrule
Activating the amiibo functionality in the game requires selecting the dedicated ability from the main power wheel. Once activated, scanning a figure on the controller's NFC reader instantly drops a chest and a shower of helpful resources directly onto the ground. Players can utilize this mechanic once per physical figure every calendar day to gather continuous supplies.
While the falling items range from fresh meat to rare gemstones, the real draw is the specialized equipment contained within the dropped treasure chests. Managing these daily drops properly ensures a steady intake of weapons and materials throughout your journey.
Exclusive Paraglider Fabric Designs
One of the most notable visual features introduced in Tears of the Kingdom is the ability to customize Link's paraglider sail at the Kochi Dye Shop in Hateno Village. Scanning specific Zelda series figures rewards players with exclusive paraglider fabrics inspired by historic titles like Ocarina of Time, Majora's Mask, and Twilight Princess. These cosmetic options allow players to personalize their traversal style across the skies of Hyrule.
In addition to nostalgic designs, scanning figures dedicated to characters like Zelda, Ganondorf, or the Champions unlocks themed fabrics matching their unique aesthetics. Applying these fabrics gives a distinct look while soaring above islands and depths alike.
Legacy Armor and Weapon Unlocks
Scanning figures representing previous incarnations of Link grants players access to iconic armor sets and classic weaponry from past games. Outfits such as the Hero of Time set, the Hero of Winds tunic, and the Fierce Deity armor can all be claimed through daily scans. These armor sets not only offer distinct nostalgia but also provide functional defense and stat bonuses when upgraded.
It is important to note that while amiibo offer immediate access to these legendary items, players can also discover them within hidden chests in the Depths. This design choice ensures that collecting physical figures remains an helpful shortcut rather than a mandatory requirement for full completion.
General Figure Compatibility and Daily Supplies
Figures outside the Zelda franchise are also fully compatible with the game's scanning system. Tapping any non-Zelda amiibo figure onto the controller yields a random assortment of basic survival items, such as mushrooms, fish, raw meat, and basic crafting materials. These drops serve as a convenient boost when preparing for long journeys or challenging boss encounters.
By regularly scanning a collection of figures, players can stockpile valuable cooking ingredients and fusion materials without spending extra time foraging across the map. Incorporating this routine into daily gameplay streamlines resource management for a smoother open-world experience.

Is Katamari Damacy Reroll Multiplayer Multiplayer Features and...
Katamari Damacy Reroll brings back the charming and eccentric rolling action that fans first fell in love with on classic consoles. Many players diving into this remastered title wonder if they can share the bizarre object-collecting journey with friends. Fortunately, the game includes dedicated local multiplayer options designed for head-to-head competition.
Does Katamari Damacy Reroll Have Multiplayer
Yes, Katamari Damacy Reroll features a local two-player multiplayer mode. Players can jump into competitive rolling sessions side by side on the same screen or split-screen depending on the platform. However, the game does not include native online matchmaking, meaning direct online play is limited unless using platform features like Steam Remote Play Together.
How Local VS Mode Works in Katamari Damacy Reroll
The primary multiplayer feature in Katamari Damacy Reroll is the head-to-head Battle Mode. In this mode, two players compete directly against each other in an arena to see who can build the largest Katamari within a limited time. Players can collide with each other to knock away gathered items and gain a tactical advantage.
Platform-Specific Multiplayer Controls and Setup
Setting up multiplayer varies slightly depending on the platform you are playing on. On the Nintendo Switch, two players can easily share a single pair of Joy-Con controllers for quick tabletop or TV gaming sessions. PC and console players can simply plug in two controllers to access the local versus mode directly from the main hub.
Is Co-Op Included in Katamari Damacy Reroll
Unlike some later entries in the franchise, Katamari Damacy Reroll focuses exclusively on competitive two-player action rather than cooperative campaign play. Both players control their own separate Katamari balls as they scramble across the stage for points. While it lacks full co-op story campaign support, the local battle mode still offers plenty of chaotic fun for casual gaming sessions.

Is Katamari Damacy Reroll Multiplayer Multiplayer Features and...
Katamari Damacy Reroll brings back the charming and eccentric rolling action that fans first fell in love with on classic consoles. Many players diving into this remastered title wonder if they can share the bizarre object-collecting journey with friends. Fortunately, the game includes dedicated local multiplayer options designed for head-to-head competition.
Does Katamari Damacy Reroll Have Multiplayer
Yes, Katamari Damacy Reroll features a local two-player multiplayer mode. Players can jump into competitive rolling sessions side by side on the same screen or split-screen depending on the platform. However, the game does not include native online matchmaking, meaning direct online play is limited unless using platform features like Steam Remote Play Together.
How Local VS Mode Works in Katamari Damacy Reroll
The primary multiplayer feature in Katamari Damacy Reroll is the head-to-head Battle Mode. In this mode, two players compete directly against each other in an arena to see who can build the largest Katamari within a limited time. Players can collide with each other to knock away gathered items and gain a tactical advantage.
Platform-Specific Multiplayer Controls and Setup
Setting up multiplayer varies slightly depending on the platform you are playing on. On the Nintendo Switch, two players can easily share a single pair of Joy-Con controllers for quick tabletop or TV gaming sessions. PC and console players can simply plug in two controllers to access the local versus mode directly from the main hub.
Is Co-Op Included in Katamari Damacy Reroll
Unlike some later entries in the franchise, Katamari Damacy Reroll focuses exclusively on competitive two-player action rather than cooperative campaign play. Both players control their own separate Katamari balls as they scramble across the stage for points. While it lacks full co-op story campaign support, the local battle mode still offers plenty of chaotic fun for casual gaming sessions.

Coffee Talk 2 All Drinks: Complete Recipe and...
Mastering the barista craft in Coffee Talk Episode 2: Hibiscus & Butterfly requires an understanding of how distinct ingredients merge to fulfill customer orders. As players listen to late-night stories, serving the correct beverage is essential for building relationships and shaping narrative paths. Learning the underlying logic of base ingredients and primary flavor additions makes unlocking every secret recipe a seamless experience.
Understanding the Core Brewing Mechanics
Brewing drinks in Coffee Talk 2 follows a specific three-step layering process that dictates the final product's classification. The base ingredient establishes the core beverage type, while the secondary and tertiary additions refine its warmth, cooling, sweetness, and bitterness levels. Carefully reviewing customer dialogues often provides subtle hints about their preferred ingredient balance, helping players avoid serving incorrect orders.
New ingredients like Hibiscus and Blue Pea flower introduce vibrant flavor profiles alongside returning staples like Coffee, Tea, Green Tea, Chocolate, and Milk. Mixing these new options with existing spices allows baristas to craft complex creations like Zula or Blue Lightning. Paying close attention to ingredient attributes ensures you achieve the exact balance requested by regulars during critical story beats.
Unlocking Special Hibiscus and Blue Pea Recipes
The introduction of Hibiscus tea offers a tart, refreshing red base that forms the foundation for numerous unique recipes. Combining Hibiscus with ingredients like Ginger, Honey, or Mint produces popular drinks such as Pink Spice and Sweetheart Latte. These specialized concoctions frequently satisfy characters who seek uplifting or comforting flavors after long days.
Blue Pea provides a soothing herbal alternative capable of shifting colors when combined with acidic elements like Lemon. Key recipes using this base include Butterfly Milk, Aqua's Tranquility, and Blue Marshmallow. Understanding these combinations allows players to complete their brewing logs while uncovering deeper dialogue branches with new and returning customers.
Essential Classic Coffee and Tea Combos
Traditional bases like Coffee and Green Tea remain essential for serving daily patrons in the rainy Seattle coffee shop. Classic recipes such as Black Lemon, Espresso, and Matcha Latte rely on precise ordering of secondary flavors like Cinnamon or Milk. Serving these familiar favorites correctly helps maintain high trust with long-time regulars during crucial story moments.
Experimenting with Chocolate and Milk bases expands your menu options with popular drinks like Choco Bee and Milky Way. Taking time to test various combinations in the free-brewing mode helps reveal hidden recipes without penalizing your main storyline progress. Mastering both new and returning recipes ensures every customer leaves satisfied, unlocking the best possible narrative conclusions.

Does Hogwarts Legacy Take Place Before Harry Potter...
Fans exploring the massive open-world adventure of Hogwarts Legacy often wonder how its story connects to the original books and movies. The game transports players into a rich, magical environment filled with familiar locations, ancient secrets, and mysterious forces. Understanding its exact chronological placement helps clarify why certain famous characters and historical events are absent during your journey.
The Official Hogwarts Legacy Timeline Explained
Hogwarts Legacy takes place in the late 19th century, specifically starting in the year 1890. This places the story roughly a century before Harry Potter first stepped foot inside the castle in 1991. Because of this significant time gap, the narrative acts as an independent prequel to the main saga.
By setting the game in 1890, the developers created an original adventure without disrupting established canon. Players assume the role of a fifth-year student discovering a rare connection to ancient magic. If you are looking for helpful guides on other gaming topics, check out Miriel Pastor Of Vows Location And How To Find Her In Elden Ring to assist your questing.
Why Modern Harry Potter Characters Are Absent
Since the game occurs during the 1890s, iconic figures like Harry Potter, Ron Weasley, and Hermione Granger were not yet born. Similarly, dark wizards like Lord Voldemort and Gellert Grindelwald had not yet risen to power during this historical era. The wizarding world in this period faces entirely different political tensions and regional threats.
However, players can still encounter long-lived magical entities throughout the castle grounds. Ghosts like Nearly Headless Nick and the Peeves poltergeist roam the corridors just as they do in later centuries. You may also recognize familiar family surnames among the faculty and student body, including ancestors of the Weasley and Black families.
How the 1800s Setting Shapes the Experience
The 19th-century setting provides a unique aesthetic and atmosphere for exploring the famous school of witchcraft and wizardry. The fashions, technology, and social customs reflect the late Victorian era while maintaining classic magical charm. This historical distance gives the game freedom to introduce new professors, villains, and secret locations.
Ultimately, Hogwarts Legacy offers a fresh perspective on the Wizarding World by focusing on an unexplored chapter of its history. It balances nostalgic familiarity with brand-new lore that enriches the universe. Players get to build their own magical legacy without being overshadowed by the story of the Boy Who Lived.

Anderson Or Udina For Council And Which Mass...
At the conclusion of the original Mass Effect, Commander Shepard faces a pivotal political decision regarding humanity's representative on the Citadel Council. Players must choose between Captain David Anderson, a trusted military mentor, and Donnel Udina, a career politician focused on galactic diplomacy. Deciding who should fill this vital seat shapes interactions and atmospheric details across the subsequent games in the trilogy.
Evaluating David Anderson for the Council Position
Choosing Captain Anderson places a noble and military-minded leader at the forefront of galactic politics. His unwavering loyalty to Shepard ensures that human leadership stays committed to fighting the Reaper threat directly. However, Anderson is fundamentally a soldier, meaning he frequently struggles with the bureaucratic maneuvering required in Citadel diplomacy.
In Mass Effect 2, selecting Anderson gives Shepard immediate access to reinstated Spectre status if the original Council was saved. Despite his effectiveness as an ally, canon lore reveals that Anderson grows weary of political infighting by Mass Effect 3. He ultimately steps down to return to military service on Earth, passing the political mantle back to Udina.
Analyzing Donnel Udina as Humanity's Representative
Selecting Donnel Udina presents a pragmatic choice based on political experience and diplomatic necessity. Udina understands the intricate systems of galactic governance and works aggressively to advance human influence across Citadel space. While his personality is abrasive, his background makes him naturally suited for high-stakes political negotiation.
From a long-term story perspective, choosing Udina maintains continuity with the narrative events of Mass Effect 3. If you want to check out relevant gaming content or updates, visit contoh.com for more information. Even if Udina is appointed in the first game, his political ambitions eventually lead to dramatic narrative consequences later in the trilogy.
Comparing Narrative and Gameplay Consequences
When measuring which choice yields better outcomes, the differences are primarily thematic rather than structural. Choosing Anderson provides a more satisfying emotional payoff and warmer dialogue interactions in the second installment. Conversely, choosing Udina reflects a realistic political strategy, even if it feels less personally rewarding for the player.
Ultimately, neither decision severely alters the main storyline or prevents Shepard from completing critical missions. Because Mass Effect 3 aligns both paths by placing Udina on the Council, players are free to choose based on roleplay preference. Selecting Anderson delivers moral integrity, while choosing Udina fits a cutthroat political narrative.

Are The Titanfall 2 Servers Still Up Current...
Navigating the fast-paced multiplayer arenas of Titanfall 2 remains one of the most thrilling experiences available for modern first-person shooter enthusiasts. Despite launching a decade ago, the game continues to maintain a remarkably dedicated and passionate community of Pilots worldwide. Many players frequently wonder if the matchmaking networks are functional given the age of the software and past connectivity hurdles.
Current Server Status and Official Matchmaking
The official matchmaking servers for Titanfall 2 are fully online and accessible across PC, PlayStation, and Xbox platforms. Electronic Arts and Respawn Entertainment maintain these global data centers, allowing players to find public matches routinely. While search times can fluctuate depending on your physical region and the specific hour, popular game modes like Attrition remain highly populated.
It is worth noting that while the base experience is stable, the infrastructure occasionally experiences minor technical hiccups during peak weekend traffic. Fortunately, the severe distributed denial-of-service disruptions that previously plagued the infrastructure have been successfully mitigated. Players can reliably log in and experience the fluid movement mechanics without encountering constant disconnects.
Community Modding and Alternative Networks
For PC enthusiasts seeking an enhanced level of control, the community-driven Northstar Client offers a fantastic alternative to official matchmaking. This robust modification allows users to host and browse custom dedicated servers with unique game settings and asset mods. It has served as a vital preservation tool, ensuring the community has a safe haven regardless of official corporate support status.
Using these custom setups provides additional safety layers against potential online security exploits while offering unique game modes not found in the vanilla playlists. Console players unfortunately do not have access to this client due to platform ecosystem restrictions, forcing them to rely exclusively on standard infrastructure. However, standard public lobbies on consoles remain perfectly viable for everyday matchmaking needs.
Tips for Finding Matches Quickly
To minimize your time waiting inside the public matchmaking queues, it is highly recommended to select multiple game types when searching. Limiting your playlist selection exclusively to niche game modes will significantly extend your queuing times during off-peak hours. Keeping Attrition active ensures a much higher probability of joining an active match quickly.
Another effective strategy involves changing your default data center from the main multiplayer menu screen if your local region appears quiet. Switching to a more populated international server can instantly solve matchmaking delays, though it might introduce slightly higher ping times. Ensuring your networking settings are optimized can help avoid any sudden matchmaking slicing issue causing potentially good servers to be ignored or discarded during searches.
The Long Term Outlook for Fans
The enduring popularity of this mechanical masterpiece guarantees that finding online matches will remain possible for the foreseeable future. The exceptional combination of high-mobility pilot combat and heavy titan gameplay has yet to be replicated effectively by newer industry releases. This unique gameplay loop continues to draw back legacy fans alongside curious newcomers who discover the title during digital store sales.
As long as the player base continues to log in regularly, the community will naturally keep the torch burning across all modern platforms. Whether you prefer official standard servers or customized PC modded lobbies, the frontier is still waiting for your deployment. Strap into your titan chassis today and enjoy one of the finest multiplayer shooter experiences ever designed.

Where To Get Bottle Caps Pokemon Violet And...
Optimizing your team for high-level raids and competitive battles is one of the most rewarding milestones in Pokémon Violet. Among the various valuable items scattered across the Paldea region, Bottle Caps stand out due to their ability to maximize a companion's hidden potential. Knowing exactly where to purchase or farm these rare assets can save dedicated trainers plenty of time during their endgame journey.
Purchasing Bottle Caps from Delibird Presents
The most direct method to secure standard Bottle Caps is by visiting the specialized Delibird Presents shops located in major Paldean cities like Mesagoza, Levincia, and Cascarrafa. Once you progress far enough into your treasure hunt and defeat at least six gym leaders, these items become permanently available in the store's general goods section. Each individual cap costs 20,000 Poké Dollars or League Points, making it an accessible option for players with deep pockets.
For trainers looking to optimize their finances, managing resources carefully before making bulk purchases is highly recommended. Gathering extra gold through high-yielding Academy Ace Tournament runs will ensure you can easily afford a full set of upgrades for your active roster. This commercial shortcut completely removes the tedious randomness often associated with hunting for rare item drops in the wild wilderness.
Farming Bottle Caps Through Tera Raid Battles
If you prefer to earn your progression rewards through challenging combat encounters, participating in high-tier Tera Raid Battles is an excellent alternative strategy. Four-star, five-star, and six-star raid dens scattered across the map frequently offer standard and Gold Bottle Caps as random victory drops. This combat-oriented method allows active players to accumulate critical competitive items while simultaneously gathering valuable experience candies and specialized crafting materials.
Teaming up with online allies or building versatile solo counter-picks ensures your high-level raid expeditions run as smoothly as possible. Consistently clearing out the glowing crystal dens that refresh daily on your map will quickly bolster your tactical inventory without draining your savings. This rewarding gameplay loop keeps trainers engaged with the vibrant multiplayer ecosystem while preparing their favorite fighters for the ultimate challenges.
How to Use Bottle Caps for Hyper Training
Acquiring these valuable tools is only the first half of the process, as you must locate the correct expert to unlock their true power. To spend your hard-earned items, travel directly to the snowy mountain town of Montenevera and search for the specialized NPC standing next to an Abomasnow near the local Pokémon Center. This veteran trainer offers the highly sought-after Hyper Training service for any companion that has reached at least level 50 in your current party.
Handing over a standard cap allows you to instantly maximize a single individual value stat, permanently boosting your companion's core battle effectiveness. If you are fortunate enough to obtain a rare Gold Bottle Cap, the master trainer will completely maximize all six stats simultaneously in a single training session. This powerful modification system bridges the gap between casual partners and optimized competitive powerhouses, ensuring your team is ready to dominate any arena layout.

PlayStation VR2 vs Quest 3 Complete VR Headset...
The virtual reality landscape has evolved into a fierce competition between distinct hardware philosophies, leaving consumers with a critical choice for their immersive setups. On one side, Sony offers a specialized console-dependent powerhouse designed to extract maximum performance from targeted hardware configurations. On the other side, Meta delivers a highly versatile standalone alternative that eliminates tethered constraints while prioritizing mixed reality computing.
Display Technology and Visual Performance
Sony equips its premium hardware with dual 2K OLED HDR screens that produce deep contrast levels and remarkably vibrant color spectrums. This hardware choice ensures that dark scenes maintain absolute depth without the typical gray wash found in standard display modules. Furthermore, integrated eye-tracking capabilities optimize rendering efficiency dynamically by focusing maximum resolution precisely where your eyes look.
Meta approaches visual clarity through advanced pancake lenses paired with high-resolution LCD panels that minimize edge blurring across the entire field of view. The resulting image quality remains incredibly sharp and uniform, making text readability exceptionally clear during productivity or browsing sessions. However, the lack of local dimming means dark environments cannot replicate the absolute black levels achieved by its OLED competitor.
Hardware Infrastructure and Processing Freedom
Operating the PlayStation VR2 requires a continuous physical connection to a PlayStation 5 console, which provides substantial computational advantages for complex gaming architectures. This dependency allows developers to build massive, highly detailed worlds with advanced physics engines without worrying about mobile thermal limitations. The tradeoff remains the physical cable tethering your movement to a specific entertainment center space.
Conversely, the Quest 3 functions as an entirely independent ecosystem powered by an onboard mobile chipset tailored for spatial computing tasks. This architecture grants absolute spatial freedom, allowing users to establish play zones in any room without external computer hardware connections. Additionally, built-in wireless capabilities enable seamless streaming from high-end PCs if you decide to expand your software library parameters.
Tracking Precision and Mixed Reality Capabilities
Meta emphasizes mixed reality innovation by incorporating full-color passthrough cameras that blend digital elements with your physical surroundings with impressive spatial accuracy. This allows users to interact with virtual screens while remaining fully aware of their actual physical environment. The tracking relies entirely on inside-out camera sensors that map room geography smoothly without requiring any secondary external anchors.
Sony focuses almost exclusively on pure virtual reality isolation, utilizing its pass-through camera primarily as a safety orientation utility rather than a gameplay mechanic. The system delivers exceptionally precise controller tracking and includes immersive haptic feedback built directly into the head-mounted frame itself. This physical rumbling sensation adds a unique layer of sensory engagement during intense environmental gameplay transitions.
Ecosystem Alignment and Long Term Value
Choosing the ideal hardware ecosystem depends heavily on your existing entertainment investments and preferred daily use patterns. If you already own a compatible console and prioritize traditional high-end gaming experiences, Sony provides an optimized turnkey solution built for performance. The focused software library ensures deep integration with major interactive franchises designed specifically for intense controller-based play.
For those seeking architectural versatility, the alternative choice offers a broader utility scope spanning fitness applications, media consumption, and spatial productivity software. The standalone nature lowers the barrier to entry for household members who prefer casual entertainment over dedicated gaming marathons. Ultimately, the decision rests between a powerful tethered gaming specialist and a flexible, wireless spatial computing generalist.

how to jump on bike gta 5 Complete...
Navigating the sprawling streets of Los Santos in Grand Theft Auto 5 offers players a massive variety of transportation options, but few are as rewarding to master as the humble bicycle. Whether you are scaling the peaks of Mount Chiliad or escaping from local authorities through narrow alleyways, knowing how to utilize your bicycle mechanics effectively can completely change your traversal options. Mastering the art of the bunny hop is essential for clearing unexpected obstacles and accessing hidden rooftop locations across the urban landscape.
The Fundamental Controls for Jumping on PC
For players navigating San Andreas using a traditional keyboard and mouse setup, executing a standard bicycle jump relies on a dedicated hotkey configuration. Pressing the spacebar while moving forward allows your character to compress the suspension and launch the bike into the air smoothly. This mechanic is highly responsive, meaning that holding down the spacebar longer will result in a slightly higher vertical lift during your stunt runs.
Timing your release perfectly is critical when you want to clear tall concrete barriers or hop over metal fences smoothly. You can combine this movement with the leaning keys, typically Shift and Control, to control your pitch and manage your balance mid-air. This combination ensures a clean landing and prevents your character from tumbling over the handlebars during high-speed street descents.
Managing Controller Inputs on PlayStation and Xbox
Console enthusiasts utilize a different layout that relies heavily on the primary face buttons to initiate aerial maneuvers seamlessly. On a PlayStation controller, tapping the R1 button triggers an immediate bunny hop, while Xbox users must press the Right Bumper to achieve the exact same mechanical response. Keeping a steady rhythm while tapping these buttons ensures your character maintains maximum physical momentum before initiating the jump phase.
Using the left analog stick allows you to adjust your landing angle in real time, which is incredibly useful when attempting to land safely on uneven terrain or narrow staircases. Maintaining a level orientation with the ground ensures you do not lose speed or experience severe impact damage upon returning to the asphalt. Regular practice in open environments like the Vespucci Beach skate park can significantly improve your muscle memory for these precise button layouts.
Advanced BMX Stunts and Physics Manipulation
The specialized BMX bike features unique structural properties that allow for much more complex movement physics than traditional mountain or racing bicycles. By combining a standard bunny hop with aggressive forward or backward leaning motions, players can launch themselves off vertical walls to slide along flat architectural edges. This technique requires an advanced understanding of the game's physics engine to execute consistently without crashing your vehicle.
You can also use the physics manipulation to perform clean 180-degree spins, allowing you to quickly change your directional heading during intense police pursuits. To achieve this, initiate a standard jump and immediately hold the left analog stick or steering keys completely to one side before reaching the peak of your vertical arc. Mastering these combinations transforms a standard tool of recreation into a highly versatile tactical escape vehicle.
Locating the Best Practice Spots in Los Santos
Finding a secure environment to master your cycling controls is highly recommended before attempting risky maneuvers in heavy downtown traffic conditions. The famous concrete half-pipes located directly along the Vespucci Beach boardwalk offer an ideal testing ground featuring various ramp profiles and smooth transitions. This location allows you to test vertical height limits and structural grinds without the constant threat of oncoming vehicular traffic.
Alternatively, the urban drainage canals running through the heart of the city provide vast open stretches of angled concrete perfect for testing long-distance gaps. These wide channels give you ample room to build up maximum forward velocity before testing your launch timing against the upper architectural lips. Utilizing these varied environments will ensure you build a comprehensive understanding of how different surface structures influence your final landing stability.

Why Does My 2K Account Keep Expiring and...
Experiencing constant logouts or expiration notices while attempting to enjoy your favorite sports simulations can be incredibly frustrating. Many gamers find themselves repeatedly entering credentials just to access online features, progress tracking, and multiplayer modes. Understanding the underlying mechanics of your profile connection is the first step toward establishing a stable gaming setup.
The Role of Email Verification Problems
One of the most frequent reasons a user profile repeatedly logs out is an incomplete registration process. When you initially register your details within a new title, the publisher distributes a verification link to your inbox. Failing to click this confirmation link within a specific timeframe flags the profile as temporary, causing automatic session timeouts.
To fix this specific roadblock, you should navigate directly to the official web portal and log into your dashboard. Check your profile settings to ensure your main communication address is fully authorized and marked as verified. If you cannot find the original message, requesting a new activation link usually solves the loop permanently.
Platform Linking Hurdles and Sync Errors
Modern gaming relies heavily on communication between your console network and third-party publisher databases. When you launch a game on PlayStation, Xbox, or Steam, a hidden digital handshake takes place to verify your licenses. If this automated link becomes corrupted or desynchronized, the system will continuously boot you out as a security precaution.
A highly reliable workaround for this issue is to completely unbind your console credentials from the publisher account via a web browser. Once unlinked, launch the game on your physical console to prompt a fresh login sequence. Re-establishing this bridge from scratch updates the digital tokens and prevents sudden session expiration.
Network Disruptions and Local Cache Issues
Sometimes the expiration notice is not an issue with your profile status, but rather how your hardware handles data packets. Temporary internet drops or strict firewall settings can disrupt the continuous authorization loop required by secure game servers. When a packet drop occurs, the server assumes the session has ended and prompts a complete renewal.
Clearing your hardware cache or verifying game files on your PC client can resolve deep-seated configuration errors. It is also beneficial to check if your network router configuration is blocking specific connection ports. Ensuring a stable wired connection instead of a fluctuating wireless signal drastically reduces authorization drops.
Server-Side Maintenance and Dynamic Updates
Major server migrations or live database updates can also trigger unexpected profile expiration messages across the community. When developers update backend architecture, active login sessions are often forcefully terminated to apply security patches. If you notice the issue happening to multiple friends simultaneously, it likely points to temporary developer maintenance.
During these peak traffic windows, it is best to monitor official community support channels for real-time network status indicators. Allowing the technical teams to finalize their server updates usually resolves the authentication loop without further local troubleshooting. Keeping your game client fully updated to the latest build ensures smooth communication with the dynamic login servers.

GTA San Andreas Weapon Locations for Powerful Early...
Grand Theft Auto: San Andreas drops players into a vast open world where surviving early gang wars demands adequate firepower. While the narrative gradually unlocks advanced military gear, the streets of Los Santos hide exceptionally strong armaments right from the start. Knowing where to search allows players to secure elite protection before embarking on dangerous turf missions.
Securing the Micro SMG and Tec9
The Micro SMG stands out as a highly effective choice for early drive-by shootings due to its rapid rate of fire. Players can easily locate one hidden on the roof of Sweet's house right in the heart of Grove Street. Climbing up the back wall gives you immediate access to this firearm without fighting any rival gangs.
For players seeking a similar rapid-fire alternative, a Tec9 sits underneath the concrete bridge overpass just a short distance from the initial safehouse. Snatching this firearm early maximizes your offensive capabilities during initial territory expansions. Relying on these local stashes ensures your ammo reserves stay healthy during chaotic introductory encounters.
Locating the Powerful Desert Eagle
If you prefer stopping power over fire rate, tracking down a heavy pistol should be your primary objective. A pristine Desert Eagle spawns in a beachside parking lot located within the Playa del Seville neighborhood. It rests quietly behind a small wall in the corner of the lot, away from the main streets.
This weapon deals massive damage, often eliminating hostile targets with a single well-placed shot. Utilizing this pistol gives Carl Johnson a major tactical advantage during difficult introductory rescue missions. Gathering this gear early changes the dynamic of early combat encounters completely.
Scouting the Armor and Shotgun Stashes
Defensive capability is just as crucial as raw firepower when navigating the hostile environments of Los Santos. High-grade body armor spawns reliably behind the house next to Ryder's property in Grove Street. Grabbing this vest before starting a major shootout dramatically increases your chances of survival.
To complement your defenses, a devastating pump-action shotgun can be found hidden inside the local police station or tucked away in certain inner-city alleys. This weapon dominates close-quarters engagements, making it perfect for indoor clearance objectives. Combining heavy armor with a shotgun creates an unstoppable combination for early game progression.
Unlocking Hidden Heavy Weaponry
For players who want absolute dominance, a hidden rocket launcher can be accessed with a bit of adventurous exploration. A specialized weapon spawn resides on the roof of the video studio building in the northern sectors of the city. Navigating the surrounding rooftops requires careful platforming but rewards you with unparalleled explosive capabilities.
Using heavy ordinances allows you to clear out swathes of rival Ballas factions instantly without taking direct return fire. It is wise to save this ammunition for high-stakes story milestones that feature heavy vehicle blockades. Establishing these hidden routes early turns Carl into a formidable force long before leaving the first city.

I Fought The Law New Vegas Quest Guide...
Fallout New Vegas is widely celebrated for its complex faction system and morally ambiguous choices that shape the future of the Mojave Wasteland. One early game mission that perfectly demonstrates this dynamic is I Fought the Law, which centers around the volatile New California Republic Correctional Facility. Navigating this quest requires players to carefully weigh their reputation with both the desperate convicts and the law-abiding republic.
How to Start the Quest and Prerequisites
To initiate this assignment, the Courier must travel directly to the NCR Correctional Facility located east-northeast of Goodsprings. It is crucial to approach the prison before becoming vilified by the Powder Gangers during the initial town shootout. If your reputation is intact, you can pay a small fee or use a disguise to gain entrance past the guard at the gate.
Once inside the visitor center, players need to speak with Eddie, the self-proclaimed leader of the organized prison faction. Eddie will test your loyalty by offering a series of tasks designed to secure his group's control over the facility. Completing these early tasks efficiently will prepare you for the pivotal decisions waiting at the conclusion of the storyline.
Working with the Powder Gangers
The first few tasks assigned by Eddie involve resolving internal disputes and investigating potential threats outside the prison walls. Players will need to deal with a rogue convict wandering the wasteland and gather intelligence on mysterious merchant activity nearby. These objectives allow the Courier to explore localized areas while building valuable reputation points with the criminal faction.
The final task assigned by Eddie requires you to travel to Primm and discover the plans of the nearby NCR forces. This segment reveals that the republic is actively organizing a massive assault to reclaim the fortified complex. Players who choose to remain loyal must return to Eddie and prepare the defenses to repel the impending military attack.
Betraying Eddie and the NCR Alternative
For players seeking a more law-abiding path, the quest provides an immediate opportunity for betrayal once the military plans are discovered. Instead of warning the convicts, the Courier can speak directly with Lieutenant Hayes in the military camp near Primm. Informing the officer about the prison's internal layout allows you to join the assault team rather than defending the criminals.
Choosing this path initiates a chaotic battle alongside armed troopers to eliminate the leadership inside the administration building. This choice completely dismantles the criminal network operating out of the prison and restores a semblance of order to the region. However, it will permanently ruin your standing with any surviving Powder Ganger factions scattered across the desert landscape.
Final Outcomes and Long-Term Consequences
The resolution of this mission carries significant weight for the general safety of nearby settlements like Primm and Goodsprings. Successfully defending the facility keeps the roads dangerous, forcing local traders to navigate around heavily armed convict patrols. Conversely, helping the republic secure the area establishes a firmer military presence but strains their limited regional resources.
Ultimately, the choices made during this volatile encounter echo into the final slideshow narratives at the end of the game. Players must balance immediate rewards like caps and ammunition against the overarching political landscape of the Mojave. Deciding who controls the correctional facility sets the tone for your faction alignments throughout the rest of your desert journey.

Order Initiate Scavenger Hunt Code Puzzle and Quest...
Navigating the complex world of the Order Initiate trials requires a sharp eye and analytical patience to solve its multi-layered secrets. Players who encounter this elusive quest often find themselves parsing through cryptic environmental hints scattered across remote locations. By understanding the core mechanics behind these challenges, you can unlock rare cosmetic rewards and valuable progression milestones without getting stuck.
How to Unlock the Order Initiate Trials
Before you can begin deciphering the hidden environmental messages, you must first reach the designated faction encampment. Speaking with the primary lore master will officially grant you the special parchment containing the puzzle instructions. Preparing your inventory with basic traversal gear is highly recommended before heading out into the wilderness.
The initial phase of the journey takes you through dynamic environmental zones that shift depending on your server parameters. Paying close attention to historical landmarks will give you immediate hints regarding the direction of the first physical checkpoint. Adventurers who explore the secondary pathways usually locate useful hidden supplies that help clear unexpected obstacles.
Deciphering the Cryptic Cipher Puzzle
The middle segment of the trial introduces a classic cryptographic sequence that requires matching specific symbols to historical dates. Players must interact with ancient tablets to arrange the numerical patterns in a precise mathematical layout. Failing the arrangement multiple times triggers defensive guardians, so entering the sequence carefully remains paramount.
To solve the final cipher layer safely, you should observe the geometric shadows cast by the nearby stone pillars during active daylight cycles. The alignment of these structures points directly to the active symbols needed to bypass the security wall. Recording the pattern coordinates on your secondary tracking board ensures you do not lose progress during night cycles.
Tracking Down the Lost Scavenger Relics
Once the central gate is unlocked, the objective shifts to locating three distinct artifacts buried around the treacherous valley ruins. These unique items emit a faint rhythmic hum that grows noticeably stronger as your character approaches their physical coordinates. Utilizing audio enhancement modifications can drastically reduce the total search time required for this phase.
The final relic is heavily protected by specialized proximity mechanics that demand absolute stealth from the entire adventuring party. Moving slowly past the resting guardians allows you to claim the artifact smoothly without triggering a dangerous battle encounter. Returning all three items back to the central faction pedestal successfully concludes the main quest objectives.

Mortal Kombat XL Cheat Codes PS4 and Unlockable...
Mastering the brutal arena of NetherRealm Studios' expanded fighting title requires more than just memorizing standard combos and timing blocks perfectly on the PlayStation 4. The definitive version of this classic fighter brings together an enormous roster of fighters alongside a massive collection of hidden content waiting to be discovered. Navigating the treacherous depths of the game's reward systems allows dedicated combatants to expand their aesthetic options and access hidden mechanics that completely transform casual multiplayer matches.
Unlocking Secret Characters and Costumes in the Krypt
The primary destination for expanding your digital wardrobe and discovering rare fatalities is the sprawling first-person labyrinth known as the Krypt. Players must manage their hard-earned Koins carefully to navigate the distinct zones like the Shadow Spider Kave and the Frozen Dead Woods. Investing currency at precise coordinates allows you to secure highly sought-after alternate cosmetic variations, such as the Master and Servant attire for the imposing duo Ferra and Torr.
Beyond regular chests, players can gamble their currency at the specialized Shrine to gamble for remaining customization elements. While the distribution relies heavily on random systems, saving massive amounts of wealth ensures you can eventually clear out the entire prize pool efficiently. Tracking your exact position using the built-in map coordinates prevents you from wasting valuable resources on repeat zones.
Executing Stage Brutalities and Hidden Modifiers
Environmental combat is a fundamental pillar of competitive play, and the XL expansion introduces incredibly specific requirements to trigger special cinematic match endings. Unlike standard finishing moves, stage fatalities require players to utilize background objects like hanging corpses or heavy machinery under precise health conditions. Successfully executing these maneuvers requires deep knowledge of positioning and maintaining absolute control over the final rounds of a match.
For players looking to test their reflexes, navigating the dynamic parameters of the Test Your Luck mode unlocks a massive variety of hidden gameplay modifiers. These elements introduce erratic hazards like falling meteors, tilted screens, and fluctuating health bars that force you to adapt your defensive strategies instantly. Mastering these chaotic conditions provides excellent preparation for high-stakes offline tournaments against unpredictable human opponents.
Accessing Faction War Rewards and Online Content
Aligning your profile with one of the five prominent global factions unlocks a steady stream of passive bonuses and competitive challenges that refresh daily. Contributing to your faction's overarching war efforts through successful match completions grants access to exclusive finishing moves that showcase your group's unique philosophy. Consistent participation ensures your profile ranks rise quickly, providing major currency windfalls that accelerate your progress through the unlockable vaults.
Additionally, conquering the specialized Living Towers introduces constantly shifting battle parameters that test your mastery over the entire diverse roster. These structured challenges often limit your ability to use traditional special moves or force you to win within strict time windows. Completing the most difficult premier variations rewards dedicated players with rare player card backgrounds, specialized icons, and prestigious titles that testify to your tactical supremacy in the virtual arena.

Is Helldivers Based On Starship Troopers
The explosive popularity of the Helldivers franchise has ignited widespread discussions regarding its creative origins and thematic influences. Gamers and sci-fi enthusiasts alike have noted striking similarities between the game's satirical depiction of galactic warfare and iconic science fiction properties. Exploring these artistic connections reveals how modern interactive entertainment can pay homage to classic cinema while forging its own distinct identity.
The Direct Influence of Satirical Sci-Fi
Arrowhead Game Studios has openly acknowledged that their cooperative shooter draws immense inspiration from the legendary universe of Starship Troopers. The narrative foundation relies heavily on a militaristic society hidden behind a thin veneer of hyper-patriotic propaganda and forced optimism. Players step into the boots of elite soldiers executing high-stakes drops into hostile alien territories to protect their idealized homeworld.
This thematic framework mirrors the satirical tone popularized by Paul Verhoeven's cinematic masterpiece, which famously critiqued jingoism and authoritarian structures. The overwhelming propaganda videos broadcasted inside the game directly replicate the exaggerated newsreels used to recruit citizens in the cinematic universe. This deliberate creative choice ensures that the gameplay loop is constantly accompanied by dark, comedic undertones that challenge the heroic premise.
Mechanical Parallels and Shared Threats
Beyond the underlying thematic satire, the structural design of the hostile factions presents undeniable visual and mechanical links to the classic property. The terrifying Terminid swarm consists of multi-legged insectoids that overwhelm defensive perimeters using sheer numbers and specialized biological variants. These frontline encounters force squads to utilize tactical orbital strikes and heavy weaponry to survive the relentless onslaught.
The chaotic battlefield environment captures the precise claustrophobia and desperation depicted during the historic defense sequences of the iconic film. Players must constantly balance tactical positioning with ammunition management while facing overwhelming subterranean breaches. These explosive scenarios emphasize the high mortality rates expected of frontline combatants sent into hazardous extra-solar operations.
Expanding Beyond a Single Inspiration
While the connection to galactic bug-hunting is immediately apparent, the developers heavily blended various retro-futuristic concepts to build an expansive, unpredictable playground. The inclusion of the Automaton faction introduces a completely different sci-fi aesthetic inspired by dystopian machine uprisings and robotic rebellions. This mechanical threat shifts the tactical dynamic from localized pest control to grueling trench warfare against highly organized tactical networks.
The gameplay relies on an intricate mix of table-top role-playing mechanics, industrial art designs, and realistic ballistic simulation variables. This multi-layered design philosophy ensures the franchise stands as an independent cultural phenomenon rather than a simple imitation of a single movie. Gamers can explore these complex layers by visiting the official platforms managed by to discover additional development insights.
The Evolution of Managed Democracy
The concept of Managed Democracy serves as the central narrative anchor, expanding the comedic horizons of the interactive universe. Players find themselves executing hazardous commands issued by an authoritarian regime that treats massive human casualties as minor administrative errors. This satirical element elevates the cooperative experience, transforming accidental friendly fire into a hilarious commentary on bureaucratic carelessness.
By blending intense mechanical challenges with clever social commentary, the franchise has successfully revived global interest in classic satirical sci-fi. The ongoing community efforts to defend artificial galactic sectors demonstrate how effectively these vintage narrative themes resonate with modern audiences. Ultimately, the interactive experience honors its artistic ancestors while charting a unique, highly successful trajectory across the gaming landscape.

Troll Locations In God Of War Ragnarok
Uncovering the hidden secrets in God of War Ragnarok requires players to explore far beyond the beaten path of the main narrative. Among the most rewarding optional challenges is locating and awakening the four stone troll statues scattered across different realms. These massive sleeping beasts hold the key to crafting some of the most powerful late-game equipment available to Kratos.
How to Awaken the Sleeping Trolls
Before you can battle these statues, you must first obtain a specific relic known as the Mystical Heirloom. This special item is hidden in Midgard, located behind a breakable ice wall near the Lake of Nine region. Equipping and activating this heirloom while standing directly in front of a stone statue will break the curse and begin the boss encounter.
Defeating these optional bosses rewards players with Slumber Stones, a unique crafting component. These stones are essential for forging the Steinbjorn armor set, which offers unparalleled defense and health restoration capabilities. Preparing your gear and skills before initiating these fights is highly recommended due to their high damage output.
Midgard Troll Location
The first statue you will likely encounter is Blodugr Steinn, located in the southwestern region of Midgard. You can find this frozen behemoth resting near the Derelict Outpost area, tucked away in a snowy canyon. It serves as an excellent introductory challenge for testing your combat readiness against these lumbering giants.
Navigating the frozen lake area efficiently will lead you directly to this location. Defeating this specific enemy requires precise dodging and heavy runic attacks to chip away at its massive health bar. Once fallen, collect your reward and prepare to travel across realms for the remaining encounters.
Alfheim Troll Location
The next hidden challenge takes you to the beautiful yet treacherous realm of Alfheim. Travel to the Forbidden Sands, a massive open sub-region filled with harsh desert winds and hidden puzzles. In the western portion of this desert, the stone troll Bjarg Stormr stands waiting in a secluded arena.
This particular arena gives you plenty of space to maneuver around the giant's sweeping club attacks. Utilizing Kratos' axe throws can deal safe damage from a distance while avoiding devastating ground pounds. Overcoming this sandy trial brings you one step closer to completing your ultimate armor set.
Vanaheim Dual Troll Encounter
The final and most difficult location is situated deep within the lush river delta of Vanaheim. Navigate your boat to Noatun's Garden, a ruin filled with poisonous plants and aggressive enemies. Resting inside this garden are two stone trolls, Golrab of the Ashes and Golrab of the Frost, who must be fought simultaneously.
This dual battle demands excellent crowd control skills and constant awareness of your positioning. One troll is highly resistant to your Leviathan Axe, while the other takes reduced damage from your Blades of Chaos. Balancing your weapon swaps and focusing on one target at a time is crucial for surviving this deadly botanical arena.

Steam Game Missing File Privileges Error and How...
Encountering the missing file privileges error on Steam can instantly halt your gaming session during a crucial update or installation. This issue usually indicates that the client lacks the necessary administrative permissions or encounters file lock conflicts on your storage drive. Understanding why this happens allows PC gamers to quickly resolve the interruption and get back to playing.
Understanding Why Missing File Privileges Errors Occur
The missing file privileges notification generally pops up when Steam attempts to modify locked game files. Operating system permissions, active background software, or security programs often restrict Steam from executing file changes in protected folders. Identifying these underlying conflicts makes troubleshooting significantly more straightforward.
In many instances, third-party antivirus utilities mistake essential game assets for potential threats, temporarily locking them. Additionally, interrupted downloads or lingering background tasks can create stuck temporary files that prevent smooth updates. Addressing these system permissions usually restores proper client access quickly.
Running Steam with Elevated Administrator Permissions
One of the fastest solutions involves granting the Steam launcher elevated system access on your computer. Completely close the application, right-click its desktop shortcut, and select the run as administrator option. Operating with elevated privileges allows Steam to bypass folder access restrictions and complete pending downloads seamlessly.
If running as administrator resolves your issue, you can configure the setting permanently within the application properties. Open the compatibility tab in the executable properties menu and check the administrator box. This adjustment ensures that future client updates execute smoothly without triggering permission blocks.
Verifying Game File Integrity and Clearing Download Cache
Corrupted installation data can also cause persistent permission errors during game updates. Navigating to your library, right-clicking the affected game, and selecting properties allows you to verify file integrity. Steam will automatically inspect existing assets, replace damaged components, and restore correct folder access settings.
If file verification does not fix the problem, clearing the client download cache is another effective step. Head into the Steam settings menu, locate the downloads tab, and choose to reset cached data. Re-logging into your account after this process often clears temporary stuck files blocking installation.
Adjusting Library Folder Permissions and Hardware Settings
Sometimes the issue resides directly within Windows folder ownership and storage drive security rules. Accessing your Steam library directory on your drive lets you inspect security permissions directly. Ensuring your active user account possesses full control over the folder hierarchy prevents recurring privilege conflicts.
Finally, checking for drive health issues or disabling aggressive real-time security scanning can prevent unexpected file locks. Temporarily pausing background scanners during installation helps confirm if security software interferes with game updates. Maintaining healthy drive permissions creates a reliable environment for all your digital games.

Best Handheld Devices for PS2 Emulation Compared
Reliving the golden era of sixth-generation gaming has become incredibly accessible thanks to rapid advancements in portable hardware. Finding the right balance between processing power, battery longevity, and comfortable ergonomics is essential for a smooth experience. Modern software optimizations have allowed a variety of portable systems to tackle even the most demanding titles from the classic console library.
Premium Windows Handhelds and Raw Power
Top-tier portable PCs equipped with robust architectures offer the most uncompromising performance for enthusiasts. Systems utilizing high-end chipsets can easily upscale graphical resolutions while maintaining stable target framerates across complex titles. These options provide a highly versatile environment that supports advanced software configurations and extensive texture modifications.
However, this massive performance ceiling usually comes with notable trade-offs in battery efficiency and overall portability. Users frequently need to adjust power delivery settings to ensure their device remains relatively quiet during extended gaming sessions. Investing in this category guarantees that you can play virtually the entire library without worrying about performance hiccups.
Mid-Range Android Contenders and Efficiency
Dedicated ARM-based portables have carved out a massive segment of the market by offering exceptional value and impressive thermal dynamics. Modern chipsets found in these devices handle the vast majority of classic games efficiently without producing excessive heat. Their lightweight designs make them much more comfortable to hold for hours compared to their heavier PC counterparts.
Many players find that these systems strike the absolute best balance for standard everyday use. While a few notoriously difficult titles might require slight settings tweaks, the baseline out-of-the-box performance remains highly reliable. Additionally, the excellent standby power management ensures your device is always ready for a quick session.
Compact Budget Portables and Layout Optimization
Pocket-sized options have improved drastically, allowing budget-conscious gamers to enjoy classic titles on the go. While these smaller machines may require operating at native rendering resolutions, they offer unmatched portability and nostalgia. The button layouts and display qualities on recent budget iterations provide surprising comfort given their lower price points.
Navigating the complex software setup on lower-powered hardware requires a bit of patience and realistic performance expectations. You will likely spend some time adjusting cycle-skipping options to achieve optimal results on tougher games. Nevertheless, the sheer convenience of carrying a massive library in a jacket pocket makes these affordable devices incredibly compelling.

Can The PS5 Play CDs And What Discs...
Navigating the hardware features of modern gaming consoles often leaves enthusiasts wondering about backward compatibility with older physical media formats. While the standard edition of Sony's latest hardware features a robust disc drive, its internal laser technology is specialized for high-density entertainment formats rather than vintage optical media. This guide explores the engineering limitations of the console and outlines which legacy formats can successfully spin in your current home setup.
The Direct Answer to Audio CD Compatibility
Many long-time PlayStation fans assume that because early generations easily read music albums, the newest hardware naturally retains this simple functionality. However, the standard PlayStation 5 console completely lacks the specific laser hardware required to read traditional audio CDs. Attempting to insert a standard compact disc into the system will result in an unrecognized disc error message popping up on the screen.
This hardware limitation stems from a deliberate engineering shift toward modern home theater standards and streaming solutions. Sony designed the optical drive assembly solely around advanced blueprints, leaving behind legacy audio infrastructure to reduce production costs. Consequently, audiophiles looking to enjoy their physical music collection must look to alternative standalone players or digital streaming options.
Supported Optical Media and Disc Formats
While music albums are entirely out of the question, the console remains an exceptional media hub for high-definition cinema and modern gaming software. The disc-based model natively supports 4K Ultra HD Blu-ray discs, standard Blu-ray discs, and traditional DVDs without requiring any external hardware. This makes the system an excellent addition to a modern home theater layout for physical media collectors.
In terms of gaming backward compatibility, the internal drive easily reads physical retail software manufactured for the PlayStation 4 ecosystem. This ensures that your existing physical library transitions smoothly into the next generation with enhanced loading speeds. However, older generational formats like PlayStation 3, PlayStation 2, or original PlayStation discs will not function due to software emulator restrictions.
Alternative Workarounds for Digital Audio Fans
If you still wish to hear your personal music collection through your primary home entertainment system, alternative media solutions are readily available. Players can easily rip their physical music archives into digital files like MP3 or FLAC using a traditional home computer. Once converted, these tracks can be transferred directly onto an external USB storage drive for convenient playback.
The console features a built-in media player application that recognizes modern audio formats stored on external storage devices. Simply connect the formatted drive to one of the high-speed USB ports on the back of the console to access your custom playlist. Additionally, integrating popular digital streaming apps directly from the media dashboard offers instant access to millions of songs without requiring physical discs.
Evaluating External Drive Options and Updates
Some users wonder if connecting a third-party external optical drive via a USB port can bypass these hardware limitations. Unfortunately, the system software does not include the necessary device drivers to recognize external CD or DVD components. Any attempt to connect an unapproved disc accessory will simply result in an unsupported device notification.
Sony has firmly committed to a digital-first ecosystem for multimedia entertainment, making future software updates for CD playback highly unlikely. For those who prioritize preservation, keeping a dedicated retro player alongside your modern console remains the most reliable strategy. This approach guarantees that you can enjoy classic media formats while maximizing the potential of your current generation gaming equipment.

Battlefleet Gothic Armada 2 Cheats And Useful Commands
Battlefleet Gothic: Armada 2 delivers an immersive real-time strategy experience set in the dark universe of Warhammer 40,000. Players command massive fleets across extensive campaigns, but the harsh difficulty spikes can occasionally hinder narrative progression. Utilizing strategic modifications and external tools can help captains bypass tedious resource grinding and experiment with diverse fleet loadouts freely.
Understanding Fleet Customization and Resource Modifiers
Managing your fleet budget and renown points serves as the foundational loop for surviving the intense cosmic conflicts. Many players utilize third-party trainers to unlock infinite resources, which allows them to bypass traditional deployment restrictions entirely. This approach grants immediate access to high-tier battleships without waiting through hours of slow campaign progression.
Additionally, adjusting your campaign settings can significantly impact how quickly your crew levels up after successful skirmishes. While the base game does not feature a traditional developer console, external software can modify values like hull integrity and shield capacity. These adjustments allow you to test experimental tactical formations against aggressive AI factions without risking your primary fleet.
Optimizing Battle Commands and UI Enhancements
Controlling massive armadas in real-time requires exceptional spatial awareness and quick tactical execution during heated engagements. Players often look for ways to customize their interface parameters to track enemy ship vectors more efficiently. Implementing specific command configurations helps streamline complex maneuvers like high-energy turns and boarding actions.
Furthermore, adjusting internal game files can help players who are frustrated by the inability to respec their active fleet commanders. Swapping specific data strings enables you to reallocate skills to better match evolving threat levels in later sectors. This optimization ensures your fleet maintains maximum operational efficiency during large-scale defensive operations.
Utilizing External Tools for Sandbox Testing
Since official cheat codes are absent from the retail release, the community relies heavily on memory editors to alter gameplay parameters safely. These applications allow you to freeze custom parameters such as combustion gauges and warp escape timers during desperate encounters. Having this tier of control transforms the standard campaign into a flexible tactical sandbox.
Using these tools responsibly ensures that the core stability of your local save files remains intact throughout the narrative. Experienced tacticians recommend creating duplicate backup folders before attempting any advanced memory adjustments. This simple precaution lets you enjoy enhanced gameplay features while protecting your long-term campaign achievements.

Final Fantasy X Best Blitzball Team And Player...
Mastering the underwater sport of Blitzball in Final Fantasy X requires a strong grasp of player growth, scouting mechanics, and team synergy. While the initial match against the Luca Goers can be incredibly tough, building a dominant squad later in the game becomes a rewarding experience once you know where to look. By scouting free agents across Spira, you can assemble an unstoppable lineup capable of winning every tournament.
Selecting the Ultimate Offensive Duo
Tidus serves as the natural anchor for your offense due to his unique access to the powerful Jecht Shot technique. This special move allows him to easily knock out multiple defenders, clearing a direct path to the goal for an easy score. Pairing Tidus with a high-tier secondary forward ensures that your front line can consistently pressure opposing goalies.
Wedge stands out as an exceptional choice for the second forward position during the early and mid-game levels. Found guarding the stadium entrance in Luca, his remarkably high shot stat allows him to score from almost anywhere in the pool. As your team grows, his attributes shift dynamically, making him an interesting hybrid choice for various strategies.
Dominating the Midfield and Center Position
The center position is arguably the most critical role on the field because they dictate the initial tempo of every possession. Brother, who can be recruited inside the airship later in your journey, is widely considered the best choice for this spot. His incredible speed allows him to outrun the entire opposing team, gathering defenders together before passing to an open forward.
Maintaining absolute control over the middle of the sphere pool ensures your defense rarely faces direct pressure. A high pass stat combined with strong tackling capabilities makes a center the ultimate playmaker. Utilizing this strategy turns every transition into a fast-break opportunity for your squad.
Building a Fortified Defensive Lineup
A reliable defense requires players who possess exceptionally high attack and block attributes to stop incoming rushes. Ropp, who works at the Rin Travel Agency along the Mi'ihen Highroad, is widely regarded as an elite defender. His baseline stats are incredibly high, allowing him to disarm opponents immediately without needing complex tech setups.
Pairing a physical tackler with a high-block specialist like Zalitz creates a balanced defensive wall that AI teams struggle to penetrate. Zalitz can be easily recruited near the theater in Luca, making him an excellent early pickup. This defensive duo ensures that very few shots ever reach your goalkeeper.
Securing the Ultimate Goalkeeper
Protecting your net requires a specialized keeper with an elite catch attribute to neutralize high-damage shots. Jumal, located sitting on a bench in the Luca Square courtyard, serves as the perfect early-game goalkeeper. He provides an immediate upgrade over the starting keeper, keeping your early tournament runs smooth and successful.
For the absolute best late-game performance, Nimrook from the Al Bhed Psyches stands as the ultimate barrier. While unlocking him requires waiting for his current contract to expire, his massive catch stat is completely unmatched. Securing his talents guarantees that your net remains virtually impenetrable against any team in Spira.
All Wolfenstein Games In Order Complete Series Timeline
The Wolfenstein franchise stands as one of the most enduring pillars in video game history, effectively pioneering the first-person shooter genre. Over more than four decades, the series has shifted from stealth-based active adventure to bombastic, narrative-driven alternate history action. Understanding the sequence of these releases helps players appreciate how gaming technology and storytelling evolved since the early 1980s.
The Early 2D Stealth Pioneers
The legendary saga began long before the era of 3D graphics with Muse Software introducing Castle Wolfenstein in 1981. This innovative title focused heavily on stealth tactics, inventory management, and escaping a labyrinthine stronghold. Its direct follow-up, Beyond Castle Wolfenstein, arrived in 1984 and expanded these core infiltration mechanics by adding identity passes and silent dagger takedowns.
These early installments established the primary thematic elements that would define the franchise for decades to come. Players controlled an unnamed Allied prisoner trying to subvert enemy forces from within their own command centers. While primitive by modern standards, these tactical computer games heavily inspired the future developers who would later reshape the industry.
The Birth of the First-Person Shooter
In 1992, id Software completely revolutionized the gaming landscape by launching Wolfenstein 3D on the personal computer. This historic release introduced fast-paced, first-person action that tasked players with navigating maze-like corridors as B.J. Blazkowicz. It successfully popularized the basic mechanics of the modern shooter genre, including secret rooms, health pickups, and intense boss fights.
Following the massive success of the primary release, the developers quickly launched Spear of Destiny as a standalone prequel later that same year. This expansion added tougher level designs and new supernatural bosses to conquer. Together, these landmark titles forever shifted global gaming trends away from traditional platformers toward immersive 3D viewpoints.
The Supernatural Era and Soft Reboots
The franchise entered a new era in 2001 with the release of Return to Castle Wolfenstein, which blended gritty historical military themes with occult sci-fi experiments. Developed by Gray Matter Studios, this iteration featured an incredibly successful multiplayer mode alongside a terrifying single-player campaign. It successfully modernized the controls for modern consoles while expanding the deeper lore surrounding the main protagonist.
A few years later, Raven Software took over development duties to launch Wolfenstein in 2009 as a direct narrative continuation. This often-overlooked entry introduced supernatural powers through an ancient medallion, giving players unique combat abilities like slowing down time. While it received mixed reviews upon launch, it bridged the gap between old-school shooter design and modern cinematic action.
The Modern Alternate History Trilogy
MachineGames completely revitalized the legendary property in 2014 with the release of Wolfenstein: The New Order. This narrative masterpiece imagined a dark alternate timeline where the Axis powers won World War II using advanced technology. The game focused heavily on emotional character development, tight gunplay mechanics, and a compelling resistance story.
To expand on this fresh timeline, the standalone prequel Wolfenstein: The Old Blood arrived in 2015 to deliver nostalgic castle infiltration gameplay. The official sequel, Wolfenstein II: The New Colossus, launched in 2017 to continue the intense revolution across a conquered American continent. Finally, the cooperative spin-off Wolfenstein: Youngblood debuted in 2019, shifting the spotlight to Blazkowicz's twin daughters fighting in an alternate 1980s Paris.

Empires Dawn Of The Modern World Complete Beginner...
Empires: Dawn of the Modern World remains a standout classic in the real-time strategy genre, offering players a deep journey through historical combat eras. Stepping into this expansive battlefield requires a firm grasp of economic management and unique civilization traits. Newcomers often struggle with the sudden shifts in technology as they transition from the Middle Ages to the industrial fury of World War II.
Understanding the Historical Eras
The game splits its progression across five distinct historical epochs, altering the available technologies and units. Advancing through these periods requires massive resource investments but unlocks devastating military upgrades. Balancing your current defensive needs while saving enough materials to enter the next era is the key to victory.Each time period demands a shift in tactical mindset as cavalry units slowly give way to heavily armored tanks and aircraft. Beginners should spend time in skirmish matches to observe how resource gathering dynamics naturally alter over long play sessions. Recognizing the visual cues of an advancing opponent prevents you from being caught off guard by superior weaponry.
Choosing the Right Faction
Unlike traditional strategy games where factions share similar foundations, this title provides heavily customized mechanics for each empire. Nations like the English excel at defensive fortifications, while the Franks utilize aggressive mobile cavalry to terrorize early expansion lines. Reviewing these innate operational strengths before starting a match dictates your baseline strategy.
As the timeline shifts into modern conflicts, nations like Germany and the United States offer entirely separate technology trees. Learning these intricate counter-relationships takes patience but greatly increases your tactical flexibility. Choosing a civilization that matches your preferred pacing will lead to a much more satisfying learning curve.
Building a Sustainable Economy
A thriving military force is entirely dependent on how efficiently you organize your gathering networks early in the game. Prioritizing food and wood allows quick expansion, while gold and stone become vital for late-game advancements. Spacing out your economic hubs near secure resource nodes keeps your citizens safe from sudden raiding parties.
Managing worker allocation effectively ensures that your production facilities never idle due to unexpected material shortages. Protecting your trade routes and supply structures creates a reliable safety net during drawn-out multiplayer conflicts. Establishing a strong economy early on provides the freedom to experiment with complex army compositions without risking bankruptcy.
Basic Combat and Unit Control
Victory on the battlefield requires more than just massing a massive army and marching blindly into enemy territory. Utilizing the classic rock-paper-scissors dynamic between infantry, ranged squads, and cavalry turns the tide of close engagements. Grouping your forces into specialized control teams allows you to react instantly to flanking maneuvers.
Terrain positioning and defensive structures offer major advantages when defending your borders from aggressive neighbors. Mixing specialized siege engines with standard front-line soldiers ensures you can dismantle enemy fortifications without losing your entire army. Continuous practice with micro-management transforms vulnerable starting units into highly effective historical conquerors.

Landing Platform North Hogwarts Region Location And Access...
Exploring the sprawling highlands surrounding Hogwarts Castle requires a keen eye for collectibles that can easily be missed from high altitudes. Among these environmental challenges, landing pads offer players a unique way to complete their field guides while unlocking exclusive cosmetic gear. Finding the specific platforms nestled in the northern sector of the map requires careful navigation through dangerous terrain and dense forests.
Pinpointing the First Northern Platform Location
The first landing platform in the North Hogwarts Region is situated along the dramatic cliffside overlooking the river valley. To find it quickly, players should utilize the East North Hogwarts Region Floo Flame as a primary reference point. From this fast travel spot, mount your broom and fly directly north towards the rocky canyons where the structure sits quietly on a ledge.
Be cautious of nearby bandit camps that populate the lower valleys during your approach. Approaching the platform from a higher altitude allows you to safely land without alerting aggressive enemies below. Once you touch down on the ornate circular structure, the mechanism will activate and log your progress toward the exploration challenge.
Discovering the Hidden Forest Edge Pad
The second platform in this specific region is positioned further west, hugging the treacherous borders of the Forbidden Forest. This particular zone features dense canopy coverage, making it slightly more difficult to spot from standard flight heights. Look for a small clearing near a ruined stone structure where the wooden platform rests on a elevated ridge.
Navigating this area effectively requires dropping your flight altitude significantly to see beneath the overlapping tree branches. Using Revelio while hovering on your broom can help highlight the platform through the dense foliage. Landing here completes the regional set and brings you closer to earning the coveted Quidditch Captain cosmetics.
Essential Flight Strategies and Activation Tips
Simply flying over these structures will not count toward your total completion goals in the field guide. You must physically land your character onto the center of the platform and wait for the outer rings to spin and ignite with flames. This brief animation confirms that the location has been successfully registered to your open world progress tracker.
For players aiming to optimize their exploration routes, completing these challenges during daytime hours provides much better visibility across the mountainous terrain. Keep in mind that these landing pads do not show up as distinct icons on your map screen, making visual landmarks incredibly important. Exploring systematic grids within the region ensures that no hidden collectibles are overlooked during your journey.

Is Battlefield 6 On PS4 Platforms Supported And...
As anticipation builds for the next major installment in the iconic military shooter franchise, console availability remains a pressing question for millions of players worldwide. With gaming technology advancing rapidly, community discussions are centering heavily on whether aging hardware will be left behind in the dust. Understanding electronic arts strategic goals helps clarify where the developers are shifting their engineering focus for the upcoming war simulator.
The Reality of Last-Gen Console Support
Official development details indicate that the upcoming Battlefield title will not be arriving on the PlayStation 4 ecosystem. Electronic Arts and its collaborative studios are building this massive shooter from the ground up exclusively for current-generation systems and personal computers. This deliberate technical choice allows the development teams to bypass the severe memory constraints that previously hampered cross-generation projects.
By dropping the older platforms entirely, engineers can maximize software optimization without worrying about the lower common denominator in computing hardware. While this choice disappoints historical console loyalists, it guarantees that the software will fully utilize modern solid-state drives and advanced processing architectures. Players looking to join the next theater of war will need to transition to contemporary hardware environments.
Technical Breakthroughs and Gameplay Expectations
Without the burden of legacy compatibility, the franchise is poised to deliver unprecedented environmental destruction and physics simulations. The architectural capabilities of modern hardware allow for highly complex dynamic weather events and real-time structural collapse across massive combat zones. Gamers can expect large-scale battles that feel far more chaotic and realistic than any previous iteration in the series.
Additionally, visual fidelity is receiving a massive upgrade with native ray-tracing integration and advanced lightning models that enhance immersion. The intense tactical combat will benefit from consistent high framerates, resolving the optimization problems that frequently plagued past multiplayer releases on older systems. These technological advancements ensure that every skirmish delivers a highly responsive and breathtaking competitive experience.
Player Expectations and Future Upgrades
As the community prepares for this next digital deployment, upgrading console hardware has transitioned from an optional choice to a strict necessity. Investing in modern systems guarantees access to extensive post-launch support and massive community servers that will remain active for years to come. Gamers can look forward to a completely revitalized multiplayer ecosystem that leverages stable online servers designed for modern network infrastructures.
Ultimately, this generational shift represents a vital step forward for the longevity and evolution of tactical first-person shooters. Embracing the power of current systems ensures that developers can fulfill their creative visions without compromising core mechanics. For dedicated fans, the transition promises a superior gaming experience that fully redefines virtual warfare bounds.

Blasphemous 2 Bosses In Order Complete Boss Progression...
The dark and atmospheric world of Cvstodia returns with an array of menacing challenges in the highly anticipated sequel by The Game Kitchen. Navigating this unforgiving Metroidvania requires a solid understanding of the mandatory encounters scattered across the ruined landscape. Tracking these major threats helps players optimize their build paths and unlock new abilities efficiently.
The Initial Trials and Choice of Paths
Players begin their journey by facing the Faceless One, Chisel of Oblivion, which serves as an essential tutorial challenge. Defeating this early guardian grants access to the main hub area where the world splits open. From this point, players gain the freedom to track down the three initial main targets in any order they prefer.
These first major targets include Orospina of the Confraternity of Embroiderers, Radamés in the Sacred Entombments, and Lesmes along with Infanta in the Crown of Towers. Overcoming this initial trio relies heavily on learning enemy tells and maximizing your chosen starting weapon. Defeating them all is required before the central linear path of the narrative unlocks.
Navigating the Mid Game Sentinels
Once the initial seals are broken, the linear progression structure takes over to guide players through deeper vertical biomes. The next major encounter introduces Amana, the Sentinel of the Emery, who tests your aerial maneuvering capabilities. This battle marks a significant difficulty spike that demands precise dodge timing and patience.
Following the sentinel, the journey descends deeper into the mysterious depths of the Sunken Cathedral. Here, players must confront the multifaceted threat posed by Benedicta of the Endless Orison. Success in this encounter requires balancing active platform safety with aggressive melee combos.
The Final Keys and Devastating Evils
The late-game progression requires collecting special keys guarded by incredibly resilient entities across high-tier regions. Players must travel to the Two Moons region to challenge Svsona, the Fermosa Fembra, who utilizes massive area-of-effect spells. This encounter forces players to constantly re-evaluate their positioning to survive the onslaught.
Securing the final keys eventually leads to the ultimate confrontation against Eviterno, First of the Penitents. This legendary warrior stands as a major skill check before players can challenge the final source of the Miracle. Understanding these mechanics is essential for complete mastery of the experience.

Should You Report Nathan In Life Is Strange
Life is Strange is celebrated for forcing players into morally grey dilemmas where choices carry unpredictable consequences. One of the earliest major narrative forks occurs in Episode 1 when Max Caulfield witnesses Nathan Prescott waving a gun in the girls' bathroom. Deciding whether to report this unstable student to Principal Wells sets a distinct tone for your early interactions at Blackwell Academy.
Immediate Consequences of Telling the Truth
Choosing to report Nathan immediately shifts how school administration handles your character. Principal Wells will initially show skepticism due to the Prescott family's massive financial influence over the academy. However, establishing this paper trail early ensures the principal is far more likely to believe Max's claims during crucial confrontations at the end of Episode 2.
Furthermore, taking this route draws immediate anger from Nathan, who will aggressively confront Max in the school parking lot. This early hostility forces you to rely on external support or quick rewinds to navigate the social fallout. On the positive side, reporting the event protects your academic standing and showcases a dedication to truth from the very beginning of the story.
The Trajectory of Keeping Quiet
Choosing to hide the truth creates a completely different set of social dynamics during your first few days in Arcadia Bay. By keeping quiet, Max temporarily avoids the direct wrath of the volatile Prescott heir, granting you a brief window of peace on campus. However, this silence leaves Principal Wells highly suspicious of your behavior, as he can sense you are actively hiding something important.
This path also impacts how other characters perceive your reliability when future crises arise. If you decide to remain silent now, it becomes significantly harder to convince the administration to take action when subsequent student safety issues come to light. The lack of an official report means you must gather much stronger physical evidence later to prove Nathan's growing instability.
Long Term Narrative Impact
While the immediate reactions differ wildly, the overarching plot structure eventually aligns as the darker mystery of Arcadia Bay unfolds. Your choice here acts primarily as a tool for character development, shaping Max's personal integrity and her relationships with authority figures. It alters dialogue trees and changes how certain characters view your trustworthiness throughout the remaining chapters.
Ultimately, deciding whether to blow the whistle comes down to personal morality versus tactical survival. Reporting him establishes Max as a courageous student willing to stand up against systemic privilege, even when it causes immediate personal danger. Conversely, staying silent represents a cautious approach focused on gathering more information before making a definitive move against a dangerous adversary.

Fire Emblem Three Houses Which House To Choose
Starting a new journey in the land of Fódlan presents players with a monumental decision right at the beginning of the game. Choosing your class alliance shapes your narrative perspective, available characters, and combat strategy for dozens of hours. This comprehensive guide breaks down each faction to help you confidently determine your ideal path.
The Black Eagles and Political Revolution
Led by the ambitious heir Edelgard, the Black Eagles represent the Adrestian Empire and focus heavily on magical abilities and hidden motives. Their narrative path offers a highly unique perspective that directly challenges the established religious order of the world. Choosing this path introduces players to a complex political landscape where moral boundaries become heavily blurred.
This house features many fragile but powerful spellcasters alongside versatile axe users who can adapt to diverse battlefield roles. It is an ideal option for players who enjoy morally ambiguous storylines and tactical flexibility. Furthermore, this faction contains a major narrative branching point that significantly alters your late-game objectives.
The Blue Lions and Traditional Chivalry
Prince Dimitri leads the Blue Lions, a faction representing the Holy Kingdom of Faerghus that deeply values honor and traditional knighthood. Their storyline delivers a highly personal and emotionally grounded narrative focused on redemption and past trauma. Many experienced community members consider this path the most self-contained and satisfying journey for a first-time playthrough.
From a combat perspective, this house specializes in exceptional physical defense, high lance proficiency, and reliable raw damage output. The close childhood bonds shared among the members create highly rewarding support conversations throughout the academy phase. If you prefer a classic, character-driven fantasy tale centered on loyalty, this class is your perfect fit.
The Golden Deer and Outsider Perspectives
The Golden Deer class is guided by the charismatic leader Claude and represents the Leicester Alliance, a coalition of noble merchant families. This route takes a distinct approach by investigating the ancient lore, deep mysteries, and true origins behind Fódlan's perpetual conflicts. It provides a comprehensive overview of the global setting that other paths occasionally gloss over.
Tactically, these students excel at long-range archery and highly mobile unit configurations that can easily outmaneuver opposing armies. The team dynamics feel significantly more relaxed compared to the heavy political burdens carried by the other rival houses. Selecting this path allows you to uncover hidden truths while enjoying a highly strategic playstyle.
Key Factors to Finalize Your Decision
Your ultimate decision should rely heavily on which cast of characters appeals most to your personal storytelling tastes. While you can eventually recruit certain students into your chosen faction later, your starting lord remains locked for the entire campaign. Balancing these narrative interests with your preferred strategic combat styles ensures the most engaging experience possible.

Master Every Squeeze Baccarat Session
Squeeze baccarat offers one of the most thrilling experiences on the modern casino floor by adding a tactile and theatrical element to standard gameplay. Unlike classic card games where outcomes are revealed instantly, this format allows players to slow down the action and savour every single point. Developing a structured approach to these sessions can significantly enhance your enjoyment and improve your decision-making over time.
The Value of Controlled Pacing
The core allure of the squeeze variant relies on the intentional delay of the card revelation process. This slow reveal creates an intense psychological atmosphere that can influence how participants manage their emotions during critical rounds. Learning to maintain a steady composure while analyzing the emerging card shapes is a vital component of long-term success.
Many experienced players discover that maintaining a consistent ritual helps ground their concentration amidst casino distractions. By standardizing the time spent handling each card, you protect your focus from unexpected emotional spikes or drops. This unwavering commitment to personal discipline sets the foundation for a professional approach to the table.
Strategic Bankroll Management
Fulfilling your potential at the table requires a strict financial framework that keeps random fluctuations from impacting your style of play. Establishing clear win and loss limits prior to sitting down prevents emotional decision-making when stakes rise. A balanced strategy ensures that a participant can comfortably navigate natural winning and losing streaks.
To implement this effectively, players often seek reputable gaming platforms like M88bet to test their strategic approaches in secure environments. These platforms provide historical charts and comprehensive table statistics that support data-driven decision making. Utilizing these analytical tools allows enthusiasts to separate short-term luck from long-term mathematical probability.
Analyzing Real Time Table Dynamics
Observing table trends through traditional scoreboard patterns provides crucial insight into the current shoe flow. While every individual hand remains independent, tracking historic outcomes helps identify prevailing momentum at the table. Seasoned participants carefully watch dealer pacing and opponent reactions to optimize their position.
Choosing the correct table environment also plays an indispensable role in executing an advanced gaming plan. Finding spaces with comfortable betting thresholds and optimal commission structures maximizes your efficiency. A quiet atmosphere allows for deep concentration, ensuring that every tactical choice is executed with complete clarity.
Psychological Preparation and Mindset
Achieving consistency requires a clear mental detachment from individual round results. The suspense built into the game is specifically designed to challenge a participant's logical thinking and provoke impulsive choices. True mastery involves treating each round as an isolated event within a larger strategic journey.
Engaging in regular practice sessions helps build the intuitive confidence required to thrive under pressure. As you become more familiar with various card combinations and squeezing methods, the game naturally slows down in your mind. This focused approach transforms a game of pure chance into a deeply satisfying analytical pursuit.